Agent Builder

The Agent Builder is an advanced feature that enhances the capabilities of intelligent agents. In this environment, the agent takes control of conversational flows, triggering them according to the user's intentions. It allows for defining characteristics such as language preferences, tone of voice, and behaviors, giving the agent a unique identity and improving the quality and effectiveness of communication.
Additionally, the Agent Builder offers the functionality to import content related to your business using files, links, or text, automatically integrating it into your company's knowledge base. Users can add content directly from websites or copy and paste the desired material. This capability broadens access to diverse information, enriching the interaction and performance of the intelligent agent.
The Agent Builder is practically a turbo mode for creating intelligent agents, as it is natively integrated with AI and only requires configuring the content and deciding how the agent should behave.
Where to find it
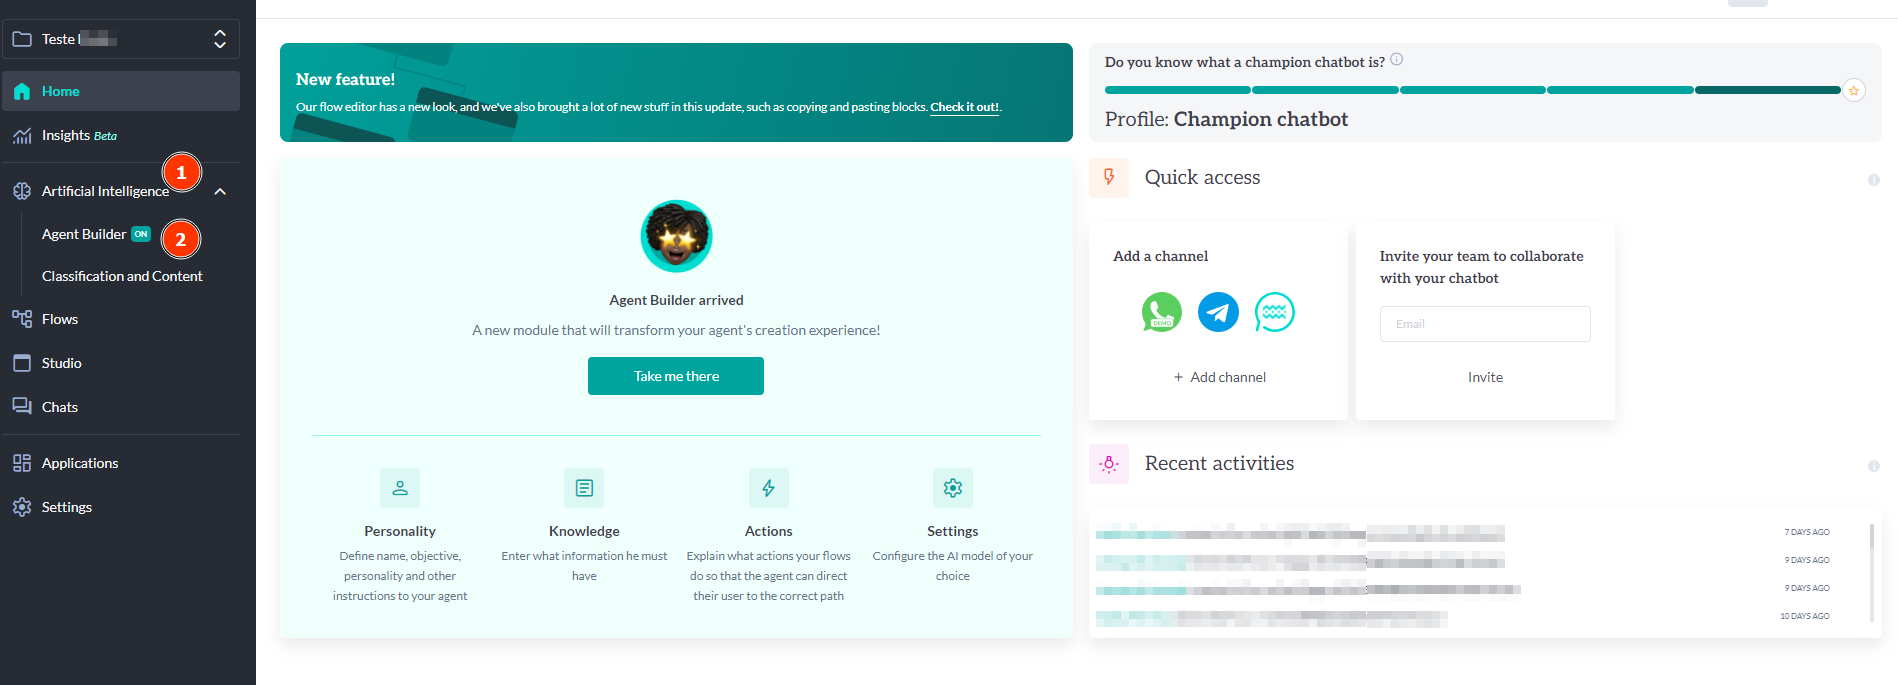
To locate the feature, access your organization and project, click on Artificial Intelligence, and then select Agent Builder from the left-hand side menu on the screen.
How to configure
In the Personality tab, you can set the agent's name and role, choose one of the available personality traits, and specify the agent's goal.
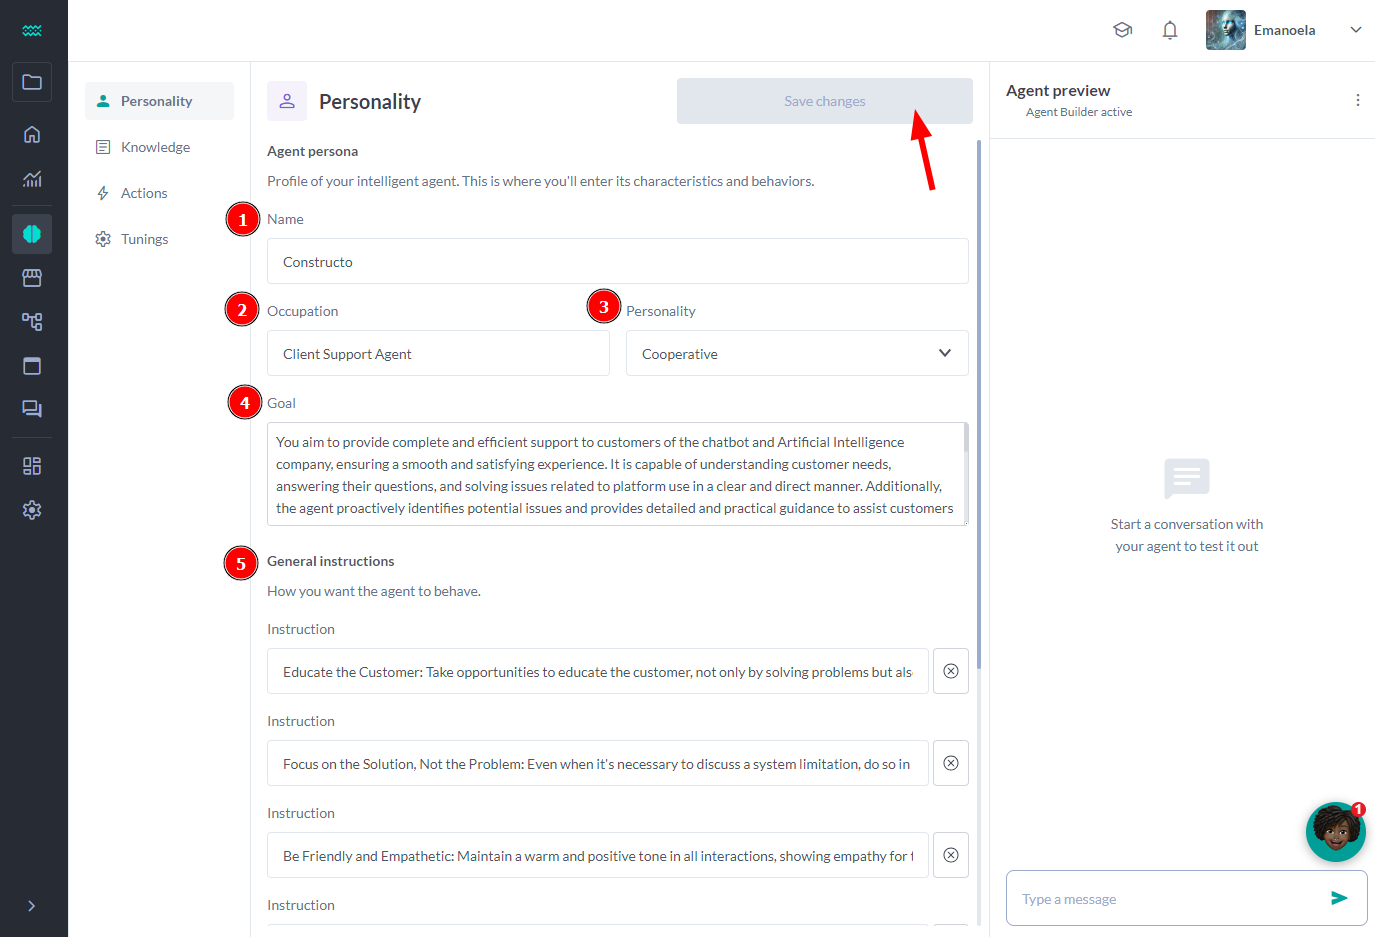
Understand the fields:
- Name: Enter the name you want to assign to your agent. This will create a closer connection with your customers.
- Occupation: Describe the function or area of expertise of your agent. For example: "Customer Support Assistant" or "Online Sales Specialist." This will provide context to the conversation and help users understand your agent's expertise.
- Personality: Choose an adjective that best represents your agent's personality, such as "friendly," "cooperative," "outgoing," among other options available in the module. This will help define the tone and style of the responses.
- Friendly: This agent is always ready to interact in a warm and welcoming manner. Their main concern is to make the customer feel comfortable and welcome, establishing a connection based on friendliness and understanding.
- Cooperative: Always willing to help and work together with the customer to find solutions, this agent prioritizes teamwork and focuses on ensuring that the customer's needs are met with minimal effort.
- Extroverted: With an animated and expressive personality, this agent loves to communicate openly and enthusiastically. They are always motivated and able to convey positive energy during interactions, making conversations dynamic and engaging.
- Generous: This agent shows a deep desire to exceed the customer's expectations. They provide additional information and resources that may be useful, even before being asked, demonstrating genuine care for the customer's well-being.
- Relaxed: Laid-back and calm, this agent handles difficult situations with ease and composure. They do everything to keep the conversation pleasant, never rushing, and give the customer the time needed to process information and make decisions.
- Organized: This agent ensures that all information is presented clearly and accessibly. They are meticulous and efficient, guiding the customer through each step in a logical manner so that no important detail is missed.
- Systematic: With a clear and well-structured approach, this agent follows defined steps to solve problems. They always take a logical and orderly approach, ensuring consistency and accuracy in communication and customer support.
- Innovative: This agent can think outside the box. When faced with a problem or difficult situation, they propose new solutions and present creative ideas that may not be immediately obvious but are effective.
- Creative: Using imagination to make communication engaging and interesting, this agent is able to offer responses in a unique way and adapt the language to make the content more relevant and captivating for the customer.
- Intellectual: Always curious and seeking knowledge, this agent provides detailed and informed answers. They strive to offer in-depth explanations based on facts and logic, meeting the needs of customers who want more clarity and understanding.
- Goal: Clearly define the main purpose of your agent when interacting with customers. For example: "Help customers find products suited to their needs" or "Provide technical support." This will guide the conversations in a direct and assertive manner.
- Behavioral instructions: How you want your agent to behave during interactions. Include guidelines on tone of voice, language style, and other important directives to ensure a consistent and positive user experience.
Instruction examples:
Knowledge
In this phase, you can provide all the essential information so that your intelligent agent can effectively access and respond to users. Use the drag-and-drop functionality to import content from files—the text will be extracted and automatically integrated into the knowledge base. Additionally, you can add content directly from websites or write and paste the desired content into the base. Once these steps are completed, click the Save Changes button to ensure all updates are successfully saved.
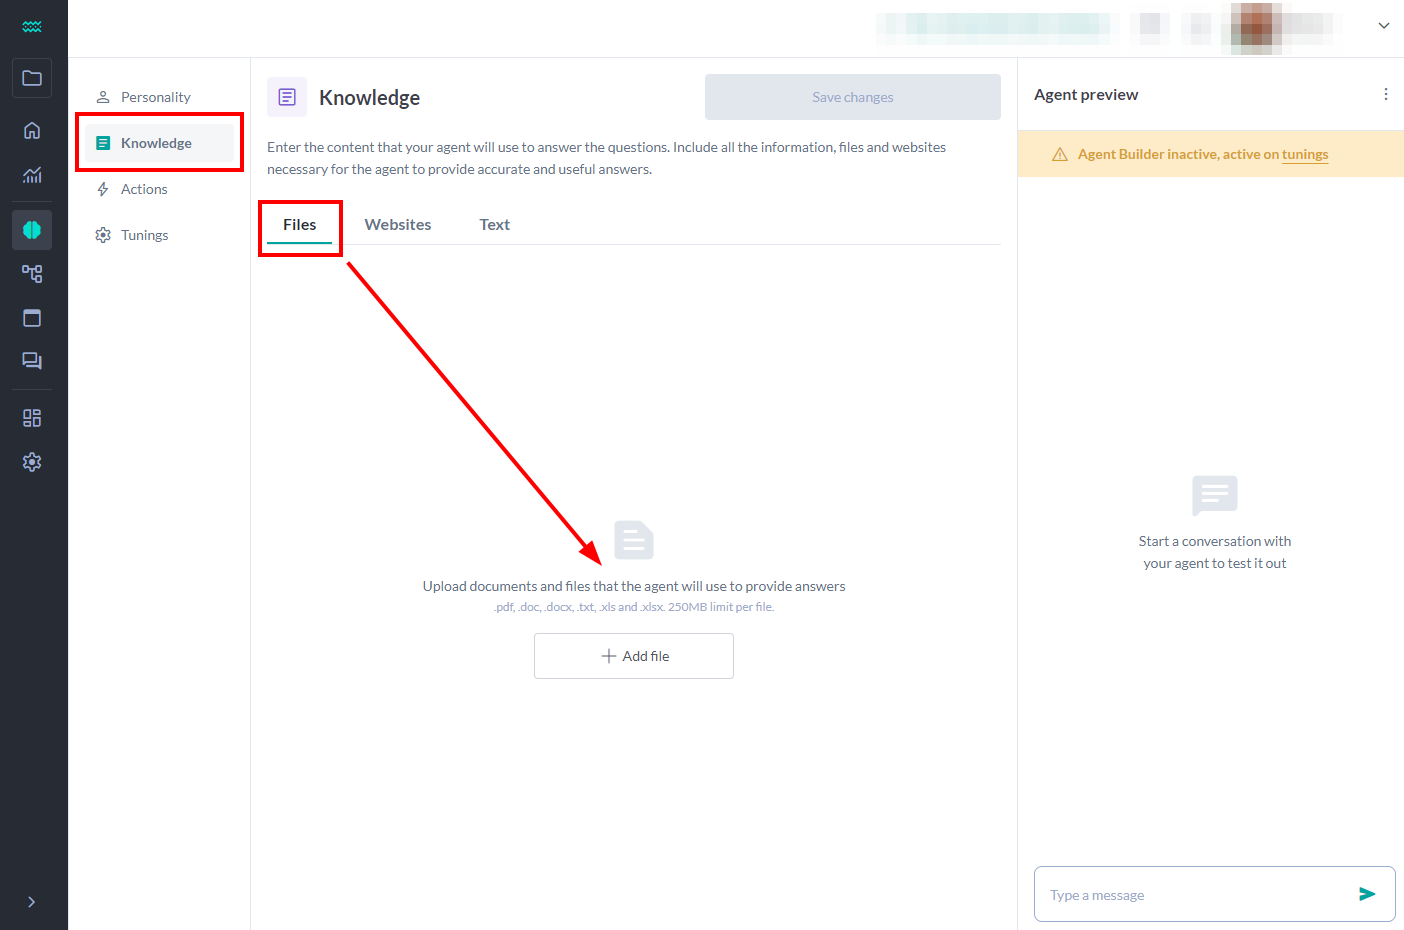
Upload the documents and files that the agent will use to provide responses:
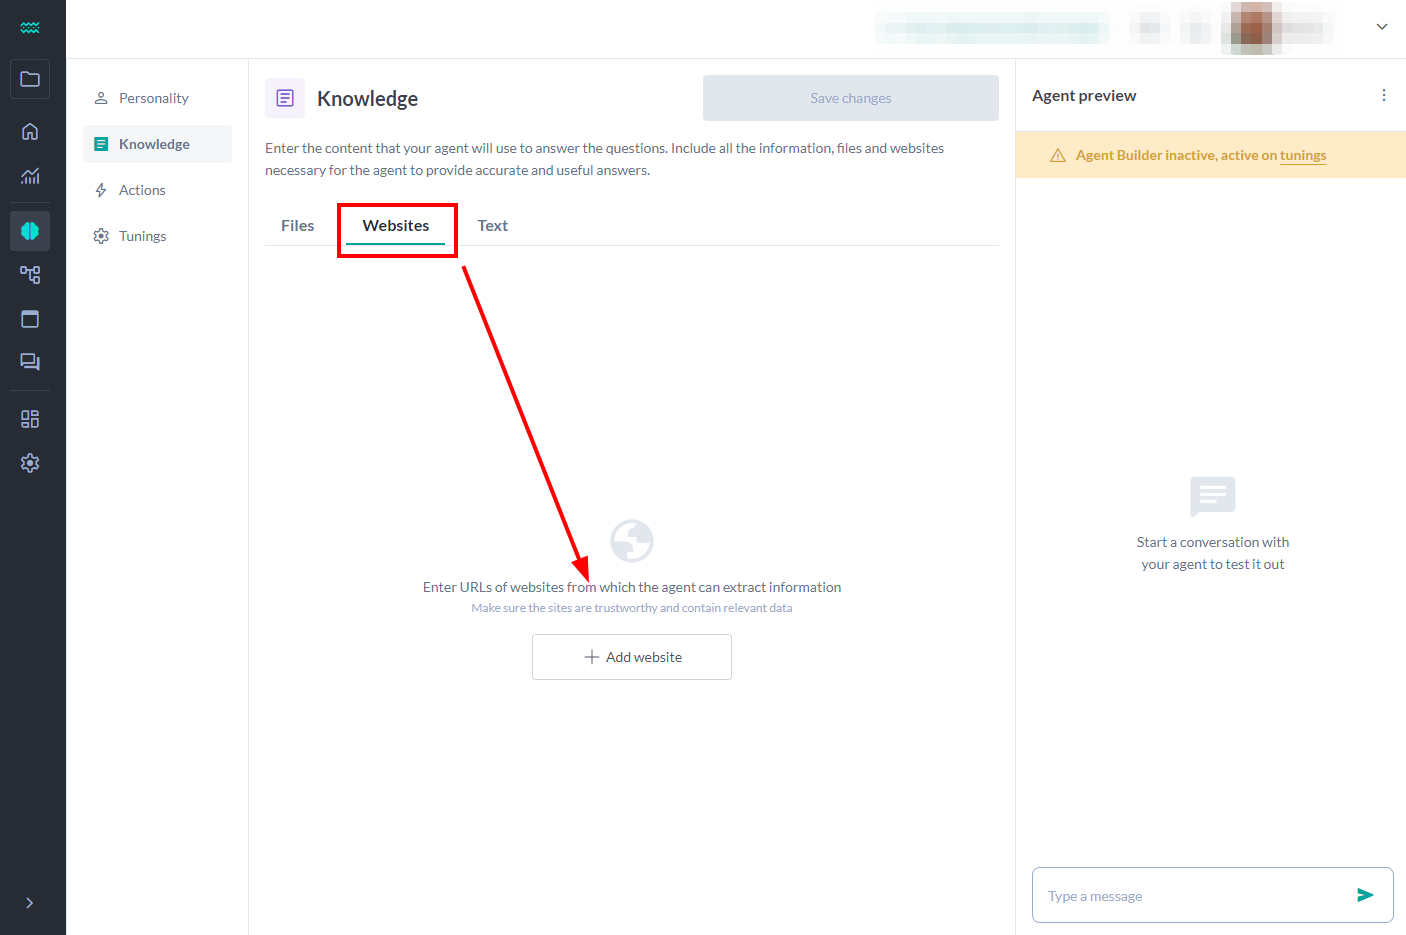
Enter URLs of websites from which the agent can extract information.
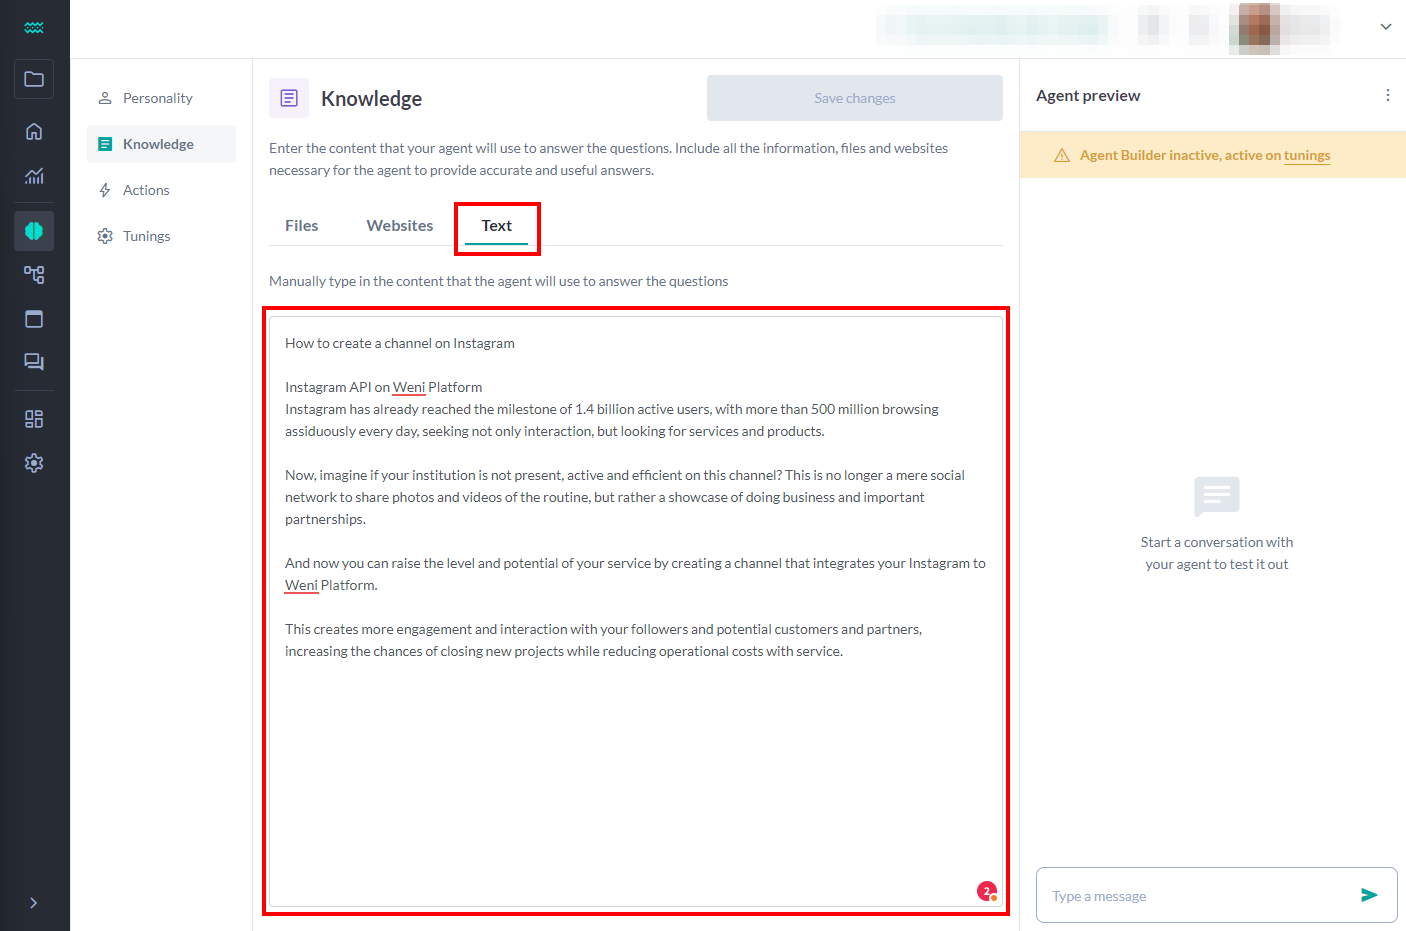
Copy and paste or manually write the content that the agent will use to respond to users. Click the Save Changes button to complete the content stage.
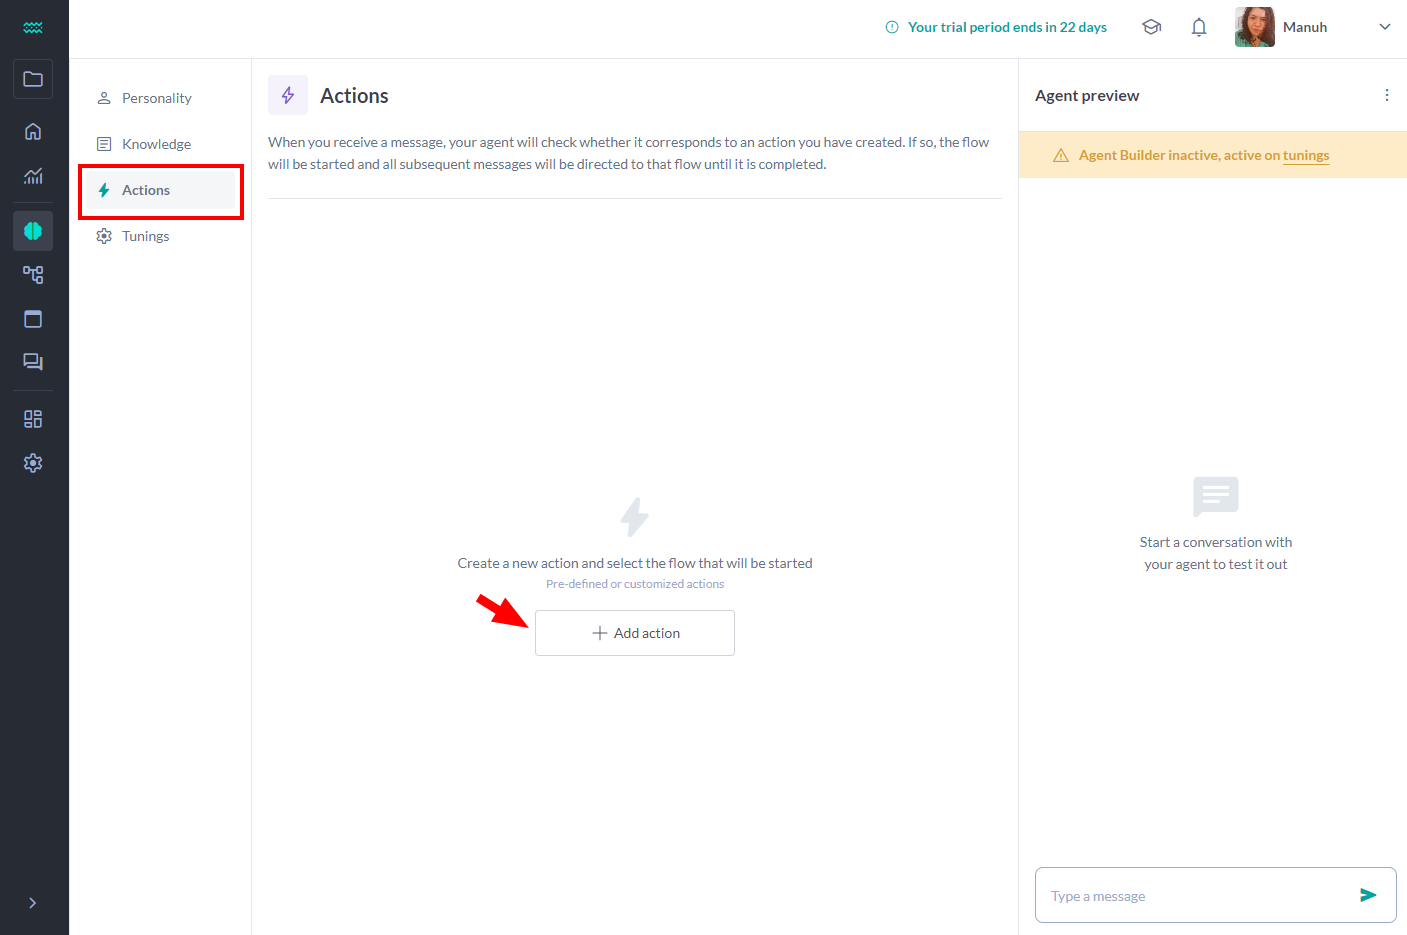
Actions
To enable your agent to trigger the necessary flows during interactions, follow the steps below in the Actions section to configure the action correctly:
- Click Add Action
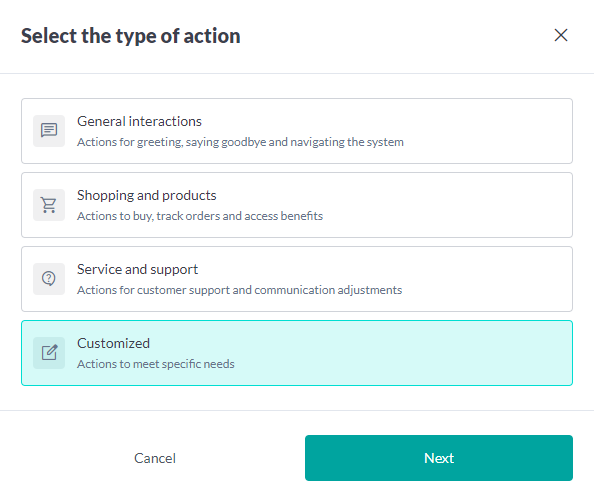
- Select the Action Type
- In the Customized Action, describe when it will be triggered and click Next.
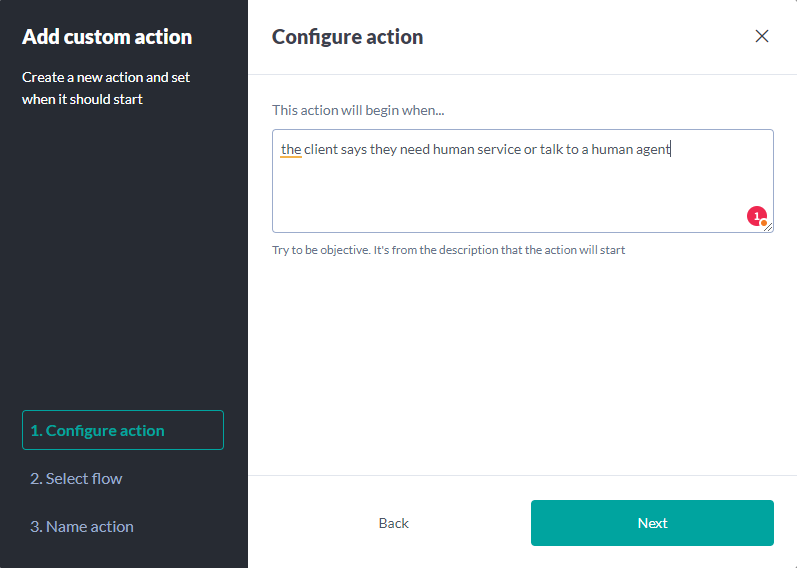
- Next, select the flow it is associated with and click Next.
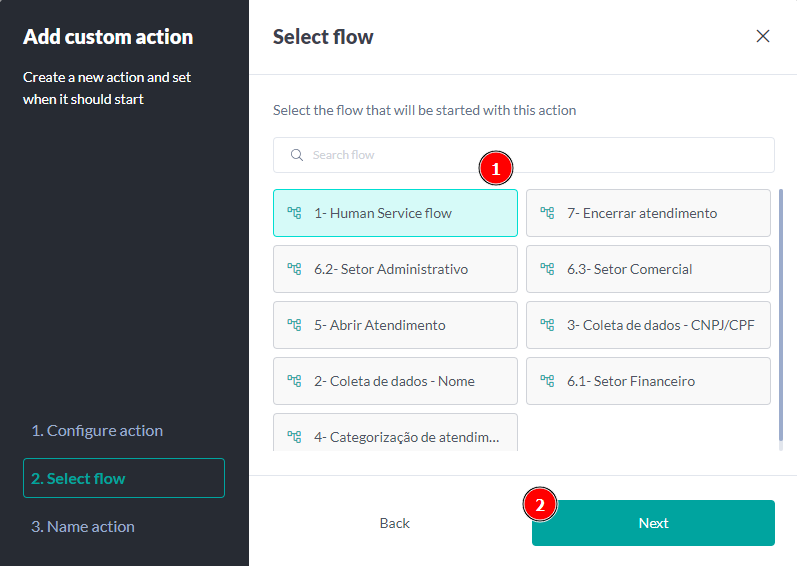
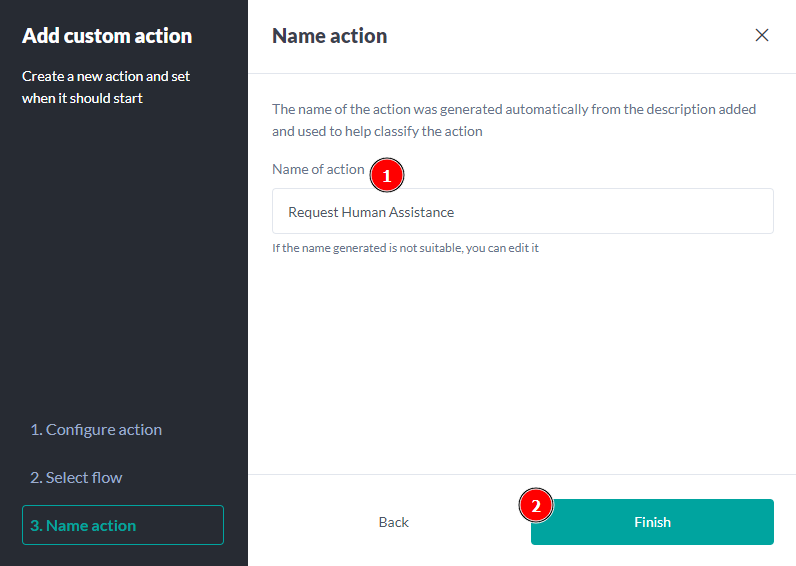
- At this stage, our AI automatically suggests a name based on the description previously entered, but you can modify it according to your preference. To finish, click Finish.
You should use actions when a user’s intention is not to generate a response, for example:
In Tunings, choose between Own Model or ChatGPT as the intelligence model to be used in the project. The Own Model is available in the shark-1 version, while to use ChatGPT, you need to provide the access token for OpenAI's API.
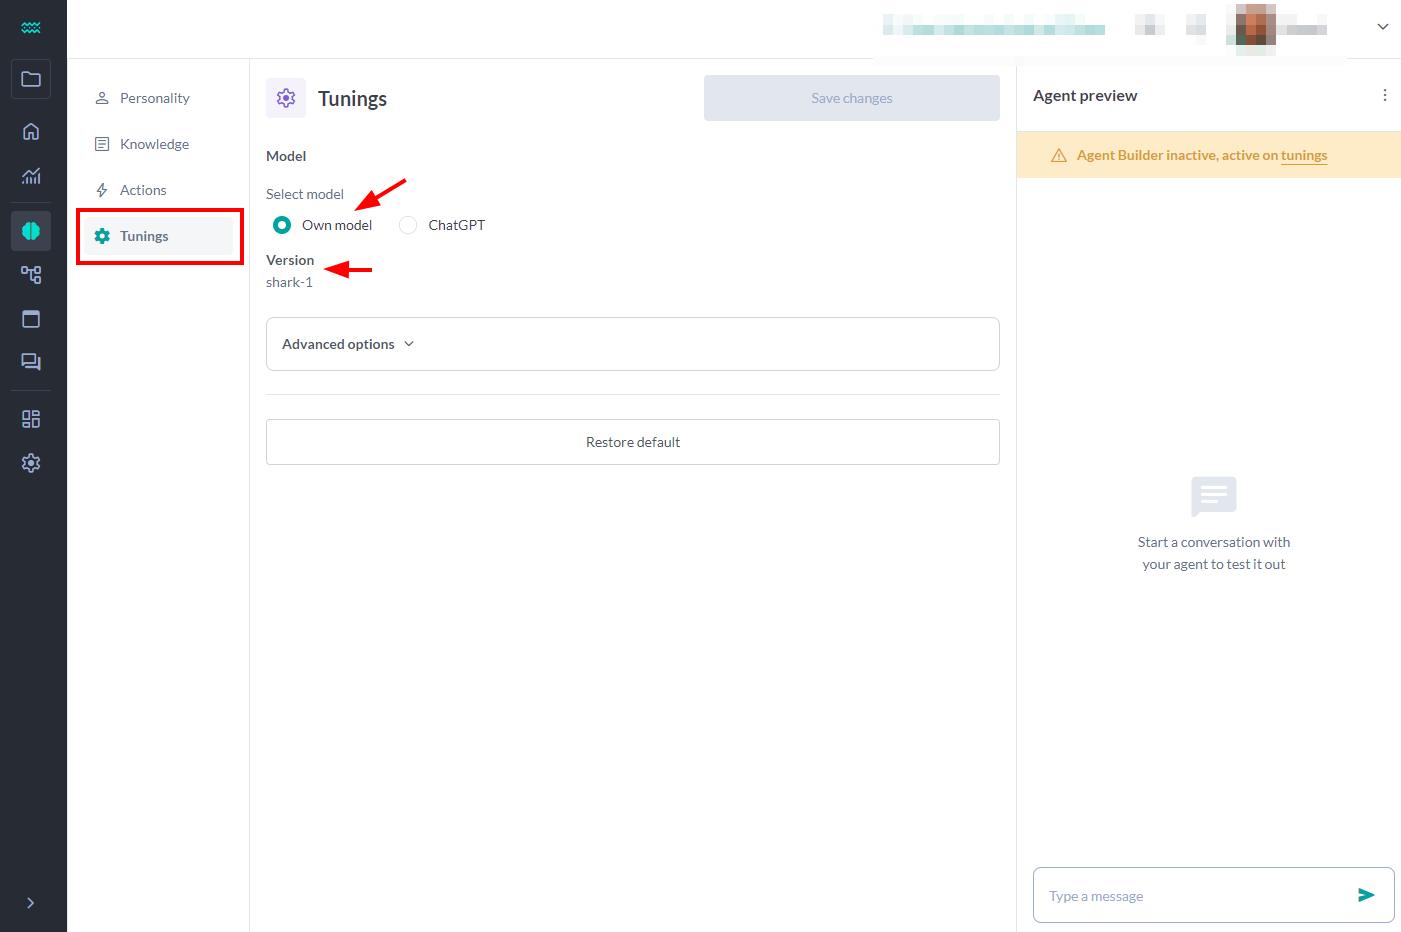
After configuring your agent, click the Save Changes button.
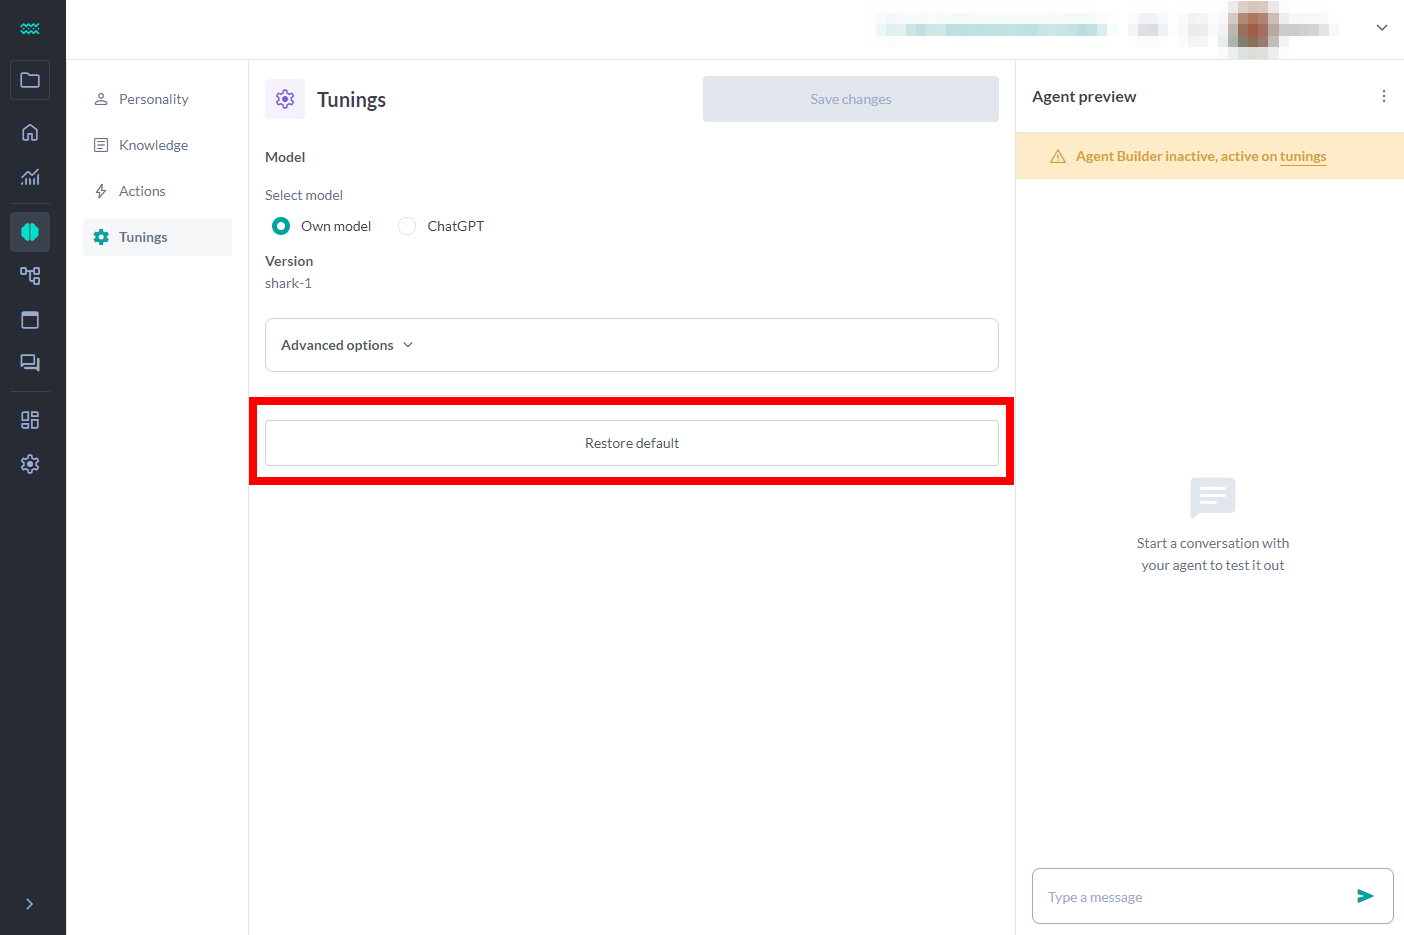
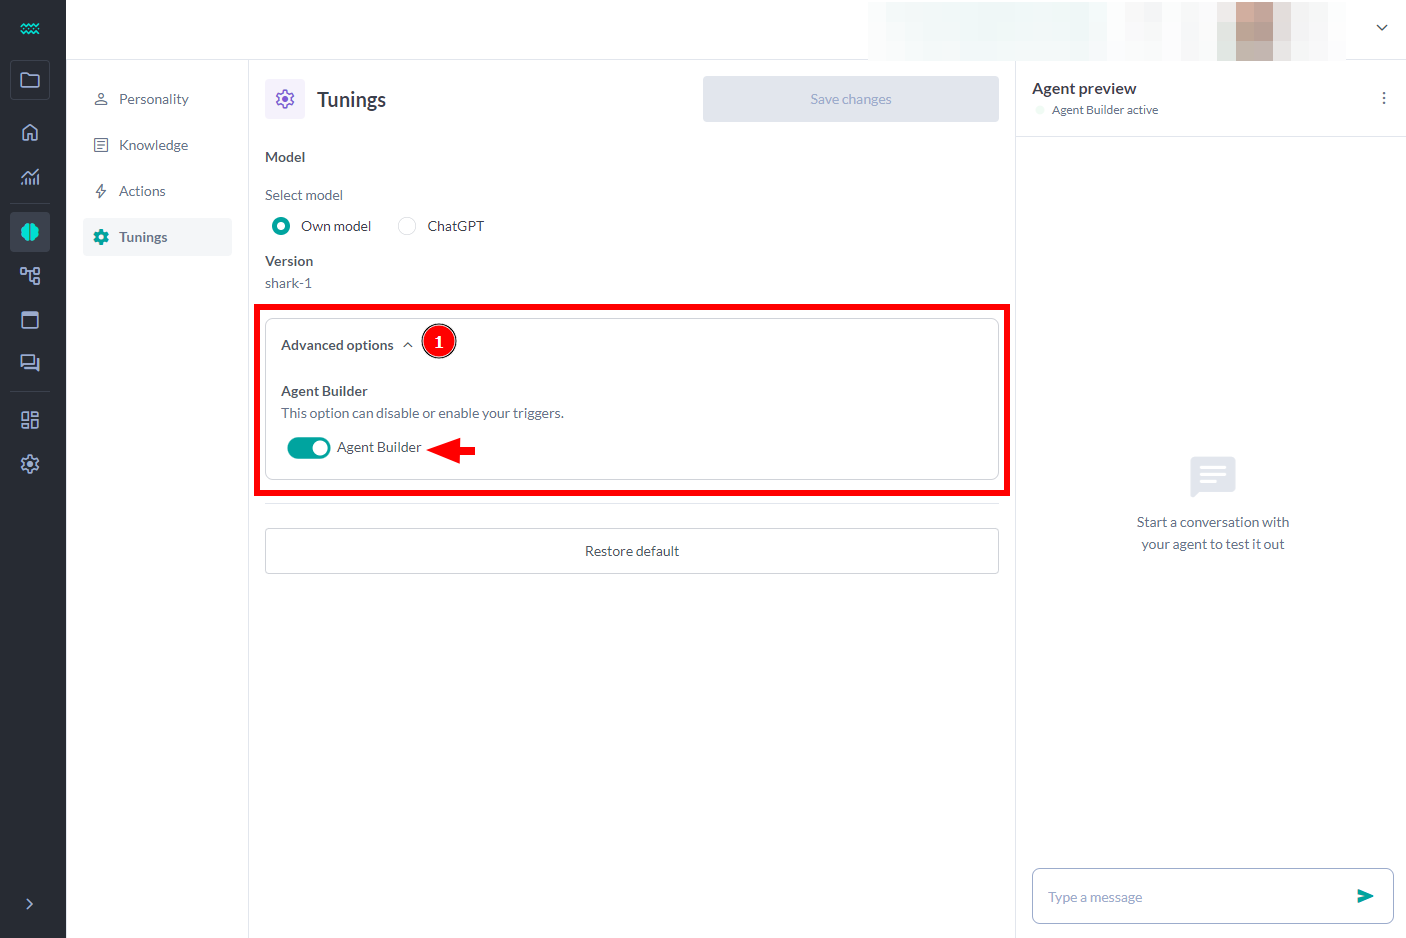
In Advanced Options, you can disable the Agent Builder, and by doing so, your Actions will be replaced by Triggers, which may directly affect your bot's functionality. Ensure that this change is suitable for your flow before proceeding.
Here’s a snapshot of the Agent Builder in action (Agent Preview):
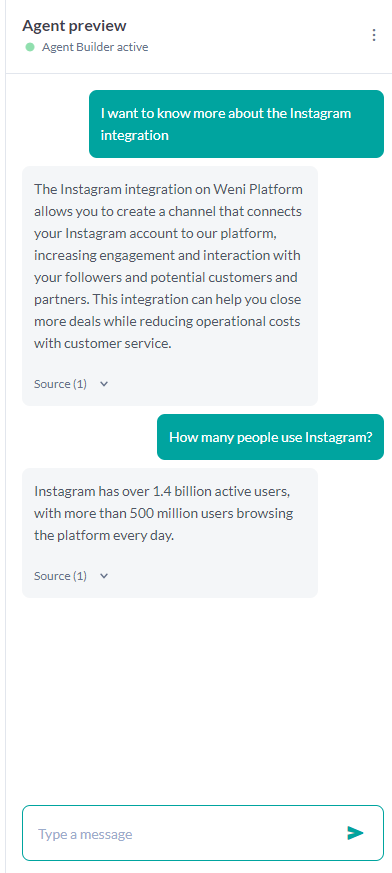
Test the Agent Builder and transform your customer interactions right now!