Flow editor and tools

What is the flow editor?
The flow editor is the environment where we create the charts and set up our flow. In it, we are free to create and edit connections, decisions and actions for our conversation.
In this article, we will talk about the tools that exist within this editor to facilitate the creation of our flows.
Simulator
One of the most used tools in creating and editing flows is the simulator. With it, we can simulate in real time a conversation that would happen with the execution of the flow we are creating.
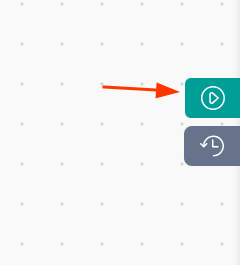
To access the simulator, just click on the button with the symbol of a cell phone in the right corner of the screen.
When you click the button, you will see the simulator, which appears in the shape of a cell phone in the right corner of the screen, with the flow running.
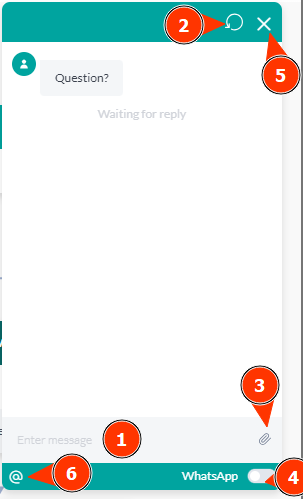
Now, you can send messages as a response to your flow using the text bar (1), restart the simulation anytime by using the simulator's restart button (2), send attachments like photos, audio, and videos using the attachments button (3), enable WhatsApp mode (4), and end the use of the simulator whenever you wish (5).
If you want a more complete version of the simulator, just press the @ (5) button that will transform the simulator to this new mode:
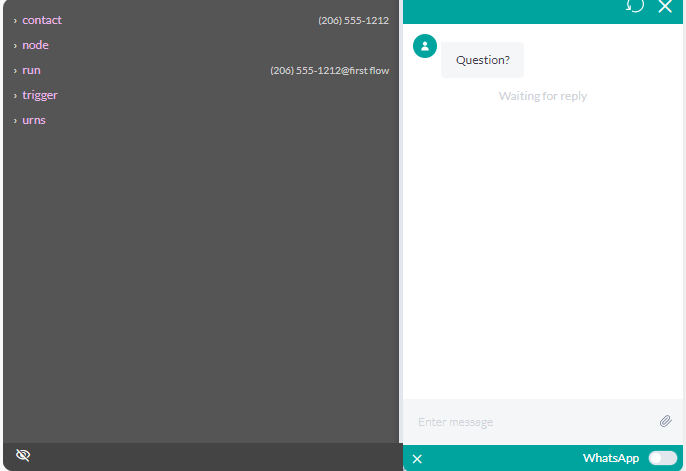
Allowing you to be able to follow in real time the changes in the expressions that are involved with that flow execution. To learn more about expressions, read the expressions article
Edition Versions
Another very useful tool is the edition version registration. Each change you make to a flow, from the creation of a new letter, to aesthetically realigning your flowchart, has your change recorded in a list of edition versions. Using this list, we were able to return the modifications of a flow to any past moment, avoiding rework to undo unwanted modifications.
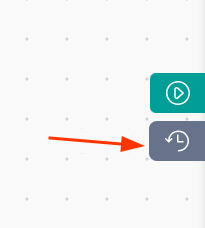
To access the edition versions, just click on the clock button just below the simulator button.
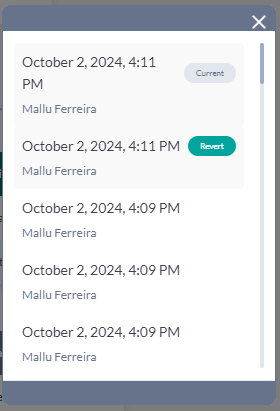
You can select one of the options from the list to see the old versions of the flow, and if you want to go back to that version, just click the revert button.
Start Flow button
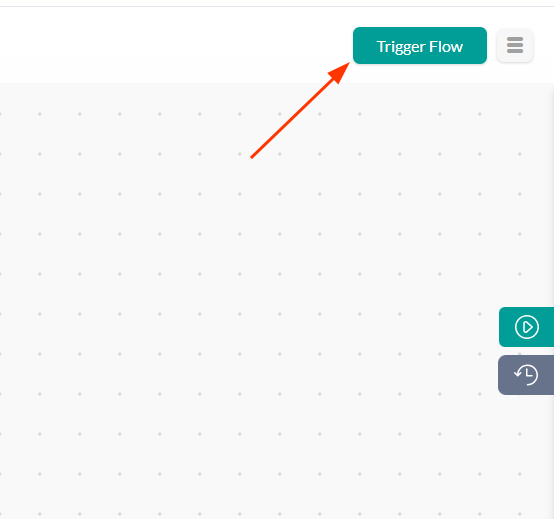
The start flow button is important for some tests and validations. With it, we were able to start a flow manually with contacts or groups that already exist on the platform. This flow, unlike the simulator, will actually be executed by the contact on your preferred channel.
The button is located in the right corner, just above the other tools shown in the article.
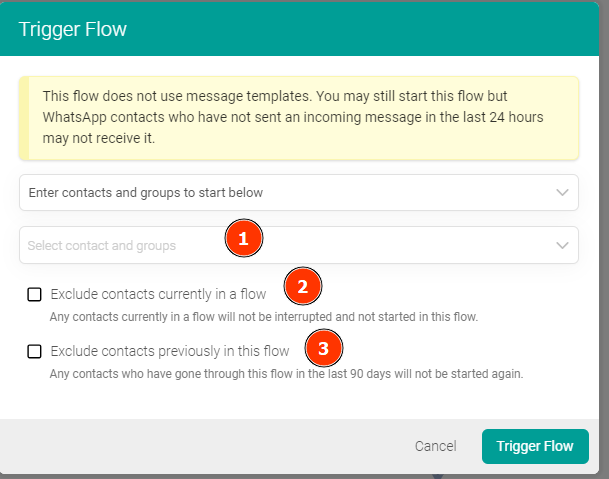
Before we launch these contacts in the flow, we can configure some details:
- Decide if we prefer to choose contacts / groups in a specific way, or if we prefer to create a rule to filter the contacts we want;
- Decide if a contact is already active in the flow in question, that flow will be restarted or not;
- Decide if a contact is already active in some other flow, that flow will be interrupted or not;
Settings menu
In addition, we have a number of options in the settings menu, which we can easily find next to the Start Flow button.
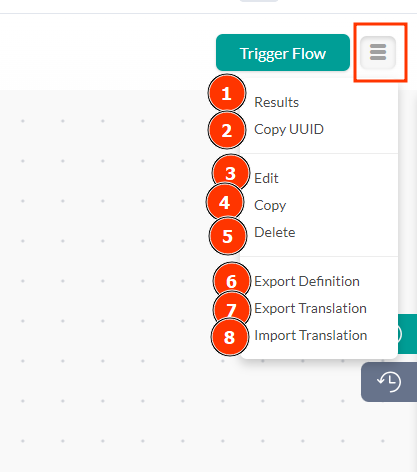
- Results: Option to analyze and export flow results, based on contact usage. A way to verify which contacts have passed through the flow.
- Copy UUID: Option that allows you to obtain the flow's identifier. Each flow has a specific UUID.
- Edit: Option to edit the initial settings of the flow, such as the name, triggers, and expiration of the flow (how long it will wait for a response).
- Copy: Option that creates an exact copy of the flow. This copied flow will appear in your flow list following the naming pattern "Copy - Name of the copied flow."
- Delete: Option to delete the selected flow. Be careful, as this operation cannot be undone.
- Export Definition: Option that redirects you to the flow export page. For more information, visit the article on flow export and import.
- Export Translation: Option that allows you to export the language translation from the platform.
- Import Translation: Option that allows you to import the language translation into the platform.
Toolbar
In this part of the Flow Editor, you will find some tools to make your work easier. Just click and use them.
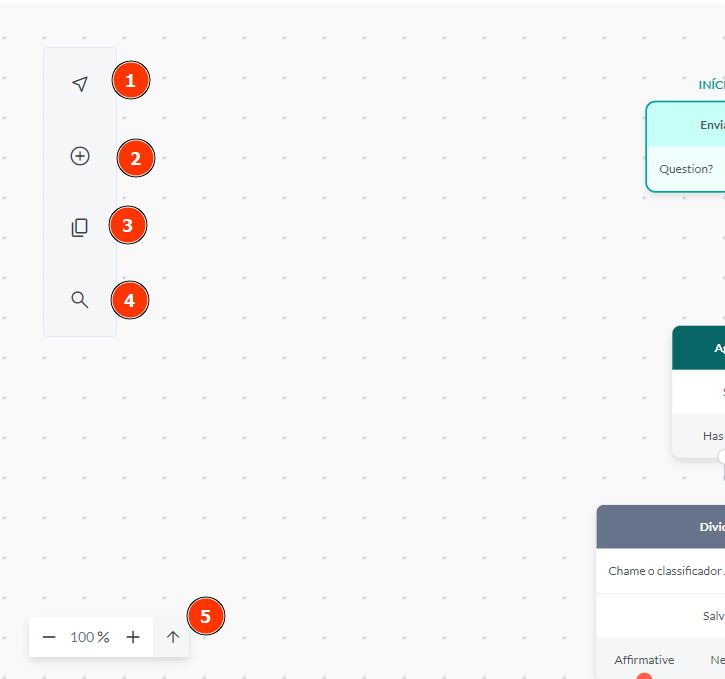
- Select and Drag: These functions help select cards (arrow-shaped button) and navigate through the flow (hand-shaped button). You can also use the "v" key to switch between these functions more easily.
- Create Block: Use this button to create any card for your flow.
- Copy: Select one or more cards and click this button to copy them. Use the Ctrl + V keys to paste. This function allows you to paste copied cards into another flow. You can also copy using the Ctrl + C keys.
- Search: Search for elements within cards, such as the card name, message text, or result name. This function can be activated with the Ctrl + F keys.
- Zoom: Allows you to zoom in or out. By clicking the up arrow, you will be directed to the beginning of the flow. It can also be activated with Ctrl + Scroll.
With that, you can now create your flows using all the resources that our editor can offer!