Initial concepts
So, what we can do with the Platform?
Register and login
First Steps - Creating your project
Profile
Permission System
Project Dashboard
Platform Glossary
Changing the Platform Language
2-Factor Authentication
Invalid authentication code
Artificial Intelligence
Human Attendance
Weni Chats: Introduction to the Chats module
Weni Chats: Human Service Dashboard
Weni Chats: Attendance distribution rule
Weni Chats: Using active triggering of flows
Using groups to organize human attendance
Studio
Contacts and Messages
Groups
Messages
Triggers and Campaigns
Adding a trigger
Triggers Types
Tell a flow to ignore triggers and keywords
Campaign introduction
How to create a Campaign
Editing events
Creating contact from an external Webhook
Contact history
How to Download and Extract Archived Data
Integrations
Settings
How to connect and talk to the bot through the settings
Adding a Facebook Channel
Adding a Viber channel
How to Create an SMS Channel - For Developers (RapidPro)
Web Chat Channel
General API concepts and Integrations
How to create a channel on twitter
How to create a channel on Instagram
How to create an SMS channel
Adding ticket creation fields in Zendesk
Adding Discord as a channel
Creating a Slack Channel
Adding a Viber channel (RapidPro)
Creating a Microsoft Teams channel
Weni Integrations
How to Use the Applications Module
How to Create a Web Channel
Adding a Telegram channel
How to create a channel with WhatsApp Demo
Whatsapp: Weni Express Integration
Whatsapp: How to create Template Messages
WhatsApp Template Messages: Impediments and Configurations
Supported Media Sending - WhatsApp Cloud
Zendesk - Human Support
Ticketer: Ticketer on Rapid Pro
Whatsapp Business API
Active message dispatch on WhatsApp
Whatsapp business API pricing
How to Verify My Business
Whatsapp Bussiness API: WhatsApp message triggering limitation
Regaining Access to Business Manager
Webhook Configuration: Message Delivery Status
The Basics of Integrations
Native ChatGPT Integration
Native Integration - VTEX
General settings
General Project Settings
Weni Chats: Setting Up Human Attendance
Weni Chats: Human Service Management
Flows
Expressions and Variables Introduction
Variables Glossary
Expressions Glossary
Flows Creation
Flows introduction
Flow editor and tools
Action cards
Zero Shot Learning
Decision cards
Adding Media to the message
Call Webhook: Making requests to external services
Import and export flows
Using expressions to capture the user's location
Viewing reports on the platform
Route markers
WhatsApp Message Card
UX Writing
Concepts
Good Practices for Chatbots Based on UX Writing
Hierarchy of information
Usability Heuristics for Chatbots
UX Text Standards
Weni CLI
- All Categories
- General settings
- General Project Settings
General Project Settings

In this article, we will explain each option in the general settings that your organization will have on our platform. They have been numbered from 1 to 10 (see the image below) and are explained in detail. To access them, click on the side menu within your project.
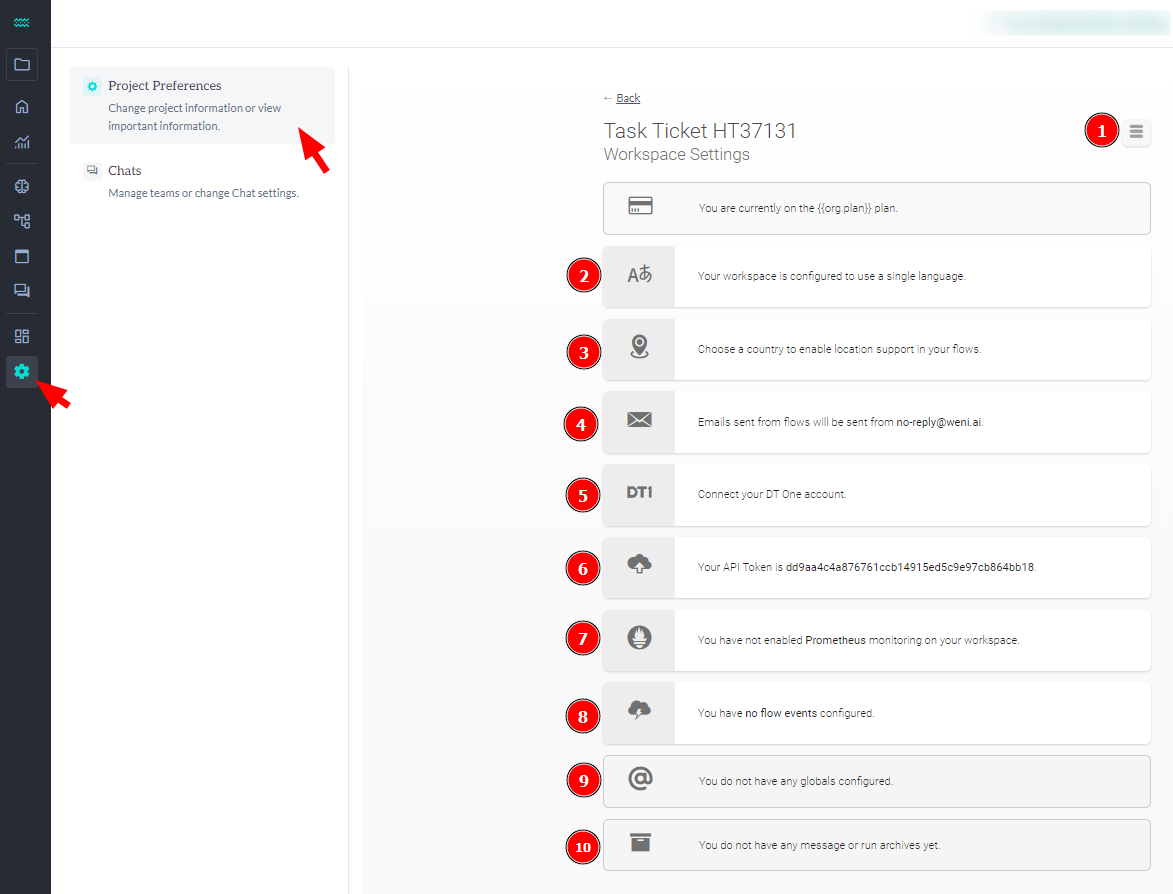
1 - Settings:
By clicking the gear icon, you will access a menu with two options:

- Export: You can export a created flow to be used in another organization.
- Import: You can import a flow from another organization to yours.
2 - Project Language:
Here, you can configure two or more languages for your organization: one primary (used by default in the flows) and others secondary (defined when creating the flow).

To add the languages, simply enter the first language in the "Default Flow" field and the others in the "Additional Languages" field.
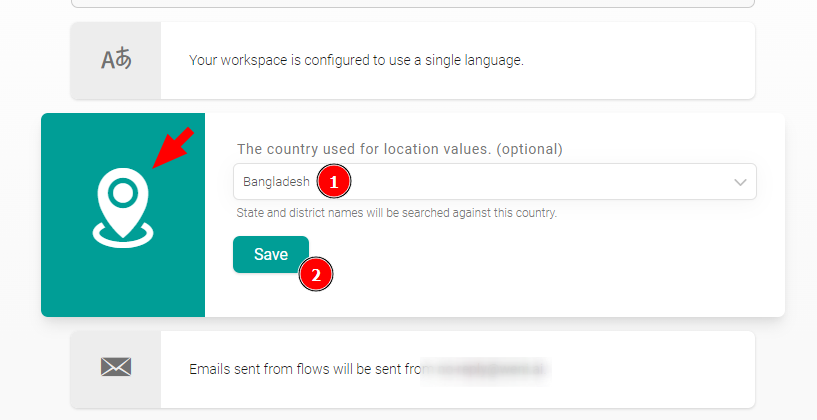
3 - Organization Location:
In this option, you can choose the location where your organization will operate.
Organization Email:
Here, you can set your organization's email. All emails sent in flows or campaigns will be sent in the name of the email defined here. To configure it correctly, follow these steps:
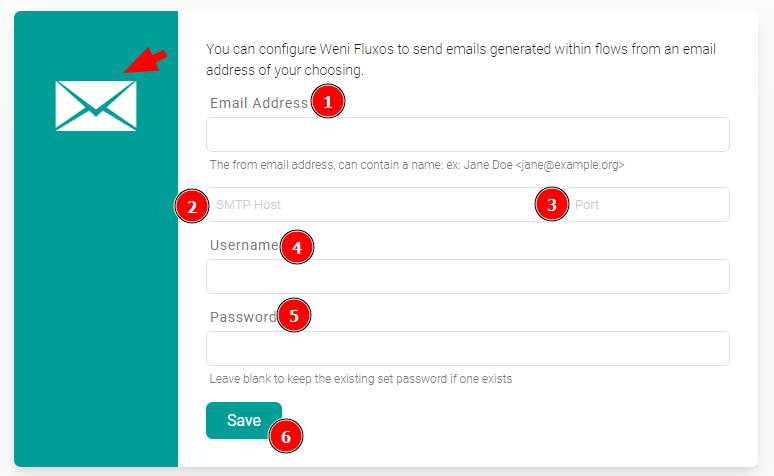
- In Email Address, enter the desired email;
- In SMTP Host, enter your SMTP host;
- In Port, enter your SMTP service port (probably 587);
- In Username, enter your email username;
- In Password, enter your email password;
- Click Save.
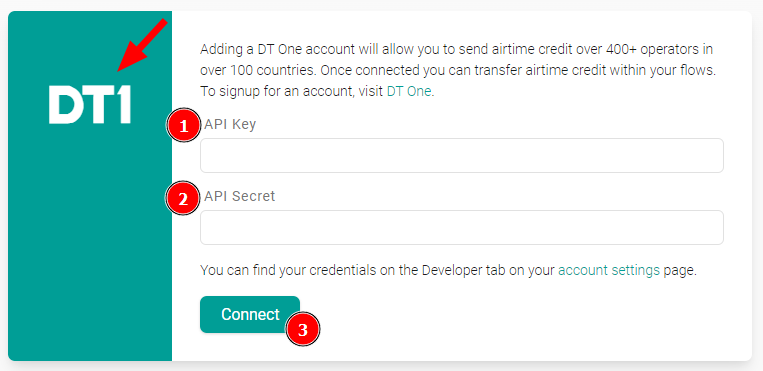
DT1:
DT1 is a platform that provides B2B digital transfers for mobile top-ups and data solutions. Configuring this option adds an additional option to the flow.
6 - Organization Access Token:
Here, you can view your API token. The token is the access key for external applications to interact with the Weni Platform API.
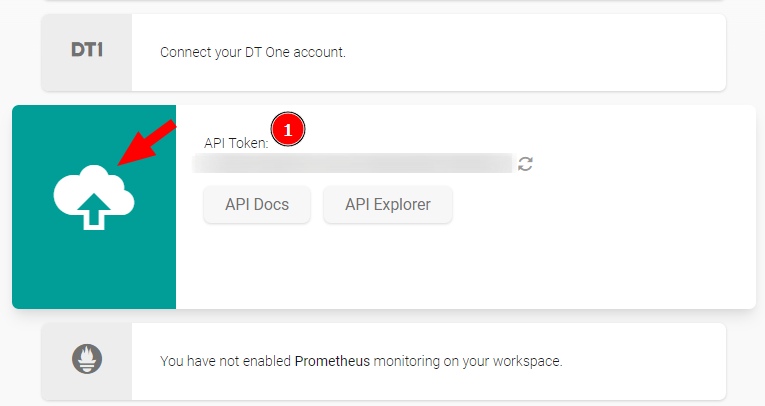
7 - Prometheus:
With Prometheus, you can monitor the contact group counter and the channel message counter in your workspace using your Prometheus endpoint. This allows you to track data over time using graphs and alerts in a control panel like Grafana.
8 - Flow Events:
These are events used for integration with some external tools, like Zapier.
9 - Globals:
Storage variables that can store data for later use within flows. For more information about Globals, visit the article on variables.
10 - Message Archive:
This is where contents related to the execution data of your flows will be stored.