Active message dispatch on WhatsApp

Active message dispatch on WhatsApp
First of all, it is important to understand the difference between active and passive dispatch.
Passive dispatch occurs when the end user voluntarily contacts the company. At this point, a conversation flow is initiated from the first message sent by the user to the company.
On the other hand, active dispatch occurs when the company takes the initiative to start a conversation with the user. For active dispatch to take place, the message to be sent needs to go through a validation process guided by Meta, and only after its pre-approval can it be sent to users. On the Weni Platform, we call this message model a Template Message.
Dispatching through the flow module
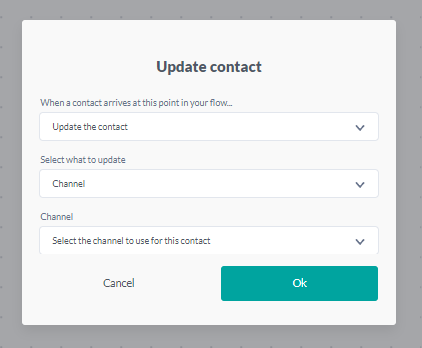
After the pre-approval of the Template Message, the conversational flow can begin to be built. The first step is to add the "Update Contact" card and choose the "Channel" option, as it will define which channel the dispatch will be sent from. At this stage, select your WhatsApp channel.
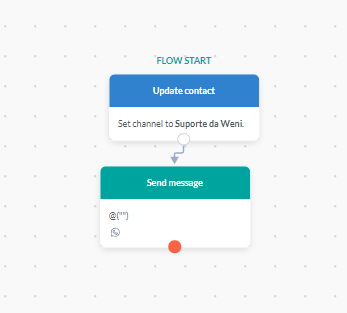
The second step is to add the send message card. In the text box, simply enter the following expression: @(“”). See the image below:
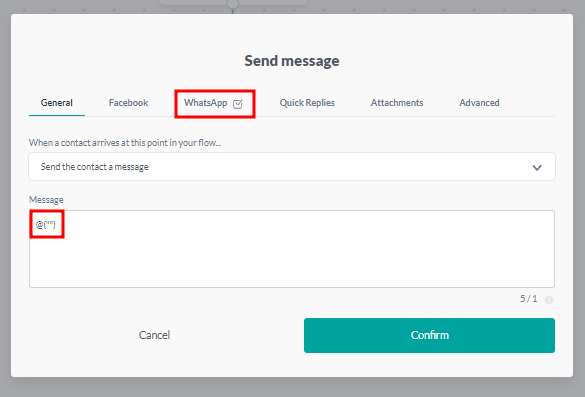
The above expression indicates that a Template Message will be sent and that this field will not be considered, as the message template to be sent to customers can be selected in the "WhatsApp" tab, located in the same "Send Message" card, as shown in the image above. By clicking on the "WhatsApp" tab, you can access the messages that have been pre-approved and select them for sending, as illustrated in the following image.
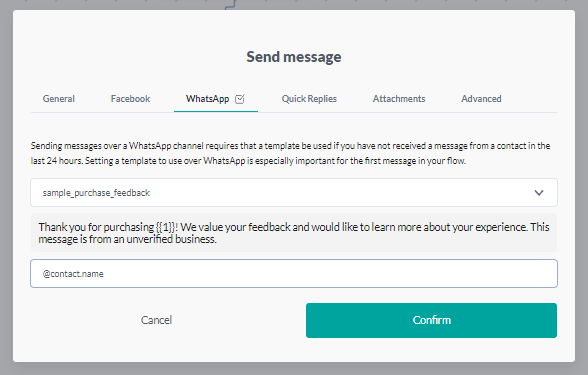
At this point, it is also possible to add variables that will make the message more personalized, such as the variable @contact.name, which addresses the user by the name registered in their own WhatsApp.
This process is always carried out for the first message and is exclusive to the WhatsApp channel. After the Template Message is delivered, if the user responds, the company can follow the message flow freely with the other action cards. The entire flow can be planned normally after the first Template Message card. For the user to be able to respond, it is necessary to add a "Wait for Response" card, thus creating a continuous service experience.
After selecting the message, simply click the "Trigger Flow" button located in the upper right corner of the screen and send it to a specific contact or a group of contacts.
Finally, to check if everything went correctly, just access the "Studio" module, and in the "Flow" tab, you can track the sending history, gaining access to important information such as errors, initiated flows, and much more. This management is essential, especially for implementing improvements to your chatbot.
Triggering a flow through the studio module
It is also possible to send a Template Message through the "Studio" module by selecting the contact to whom you want to send the message and clicking on the options menu located in the upper right corner. Then, simply select "Start in Flow," choose the flow, and send. This is another option that the Weni Platform offers for performing active dispatch. See the image below:

The active dispatch process is the same for all communication channels; however, the creation of the Template Message is exclusive to the WhatsApp channel. This means that while the use of a Template Message is not necessary for other channels, on WhatsApp, it is only possible to send a message template (to initiate the flow). In the other channels, it is possible to send more than one message without prior limitations.