Adding a Facebook Channel (RapidPro)
 Updated
by Giovana Borges Feitosa
Updated
by Giovana Borges Feitosa
To add the bot to Facebook chat it is necessary first to understand the tools involved in establishing communication:
Creating a Facebook Page – Such a profile, a page is linked to an establishment, entity, body, or service. This page is where users will have access to the chatbot through Facebook Messenger. It becomes important to mention that posts, comments, post sharing or markings will not be interpreted by the chatbot.
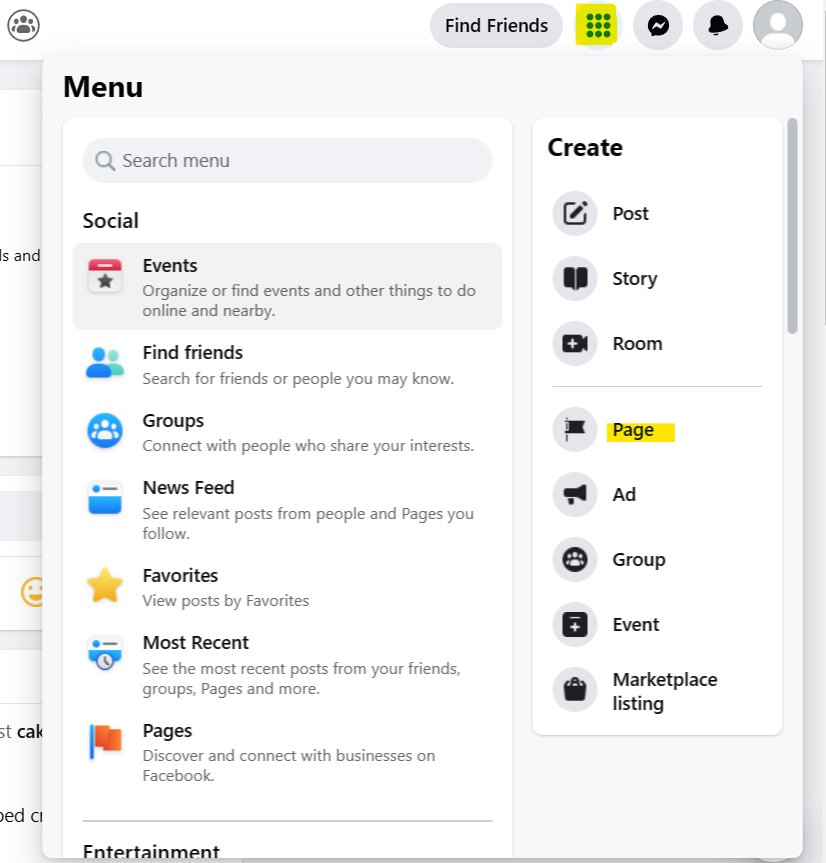
Creating an App – On the website for Facebook developers should be created an application that will act as a messaging gateway. During development/testing the app gives access to the chatbot only to its administrators, to make the app public access it needs to go through an evaluation process and fulfill some Facebook requirements.
Link app with chat – You need to configure app-supplied tokens as well as webhooks with callback URLs.
- Creating the page (skip to step 2 if you already have a configured page)
Select the Create Page option and follow the steps presented according to the characteristics of your goal. At this point, it is important to provide as much information as possible because Facebook can block your access if it detects that it may be a fake page.
- Creating the app:
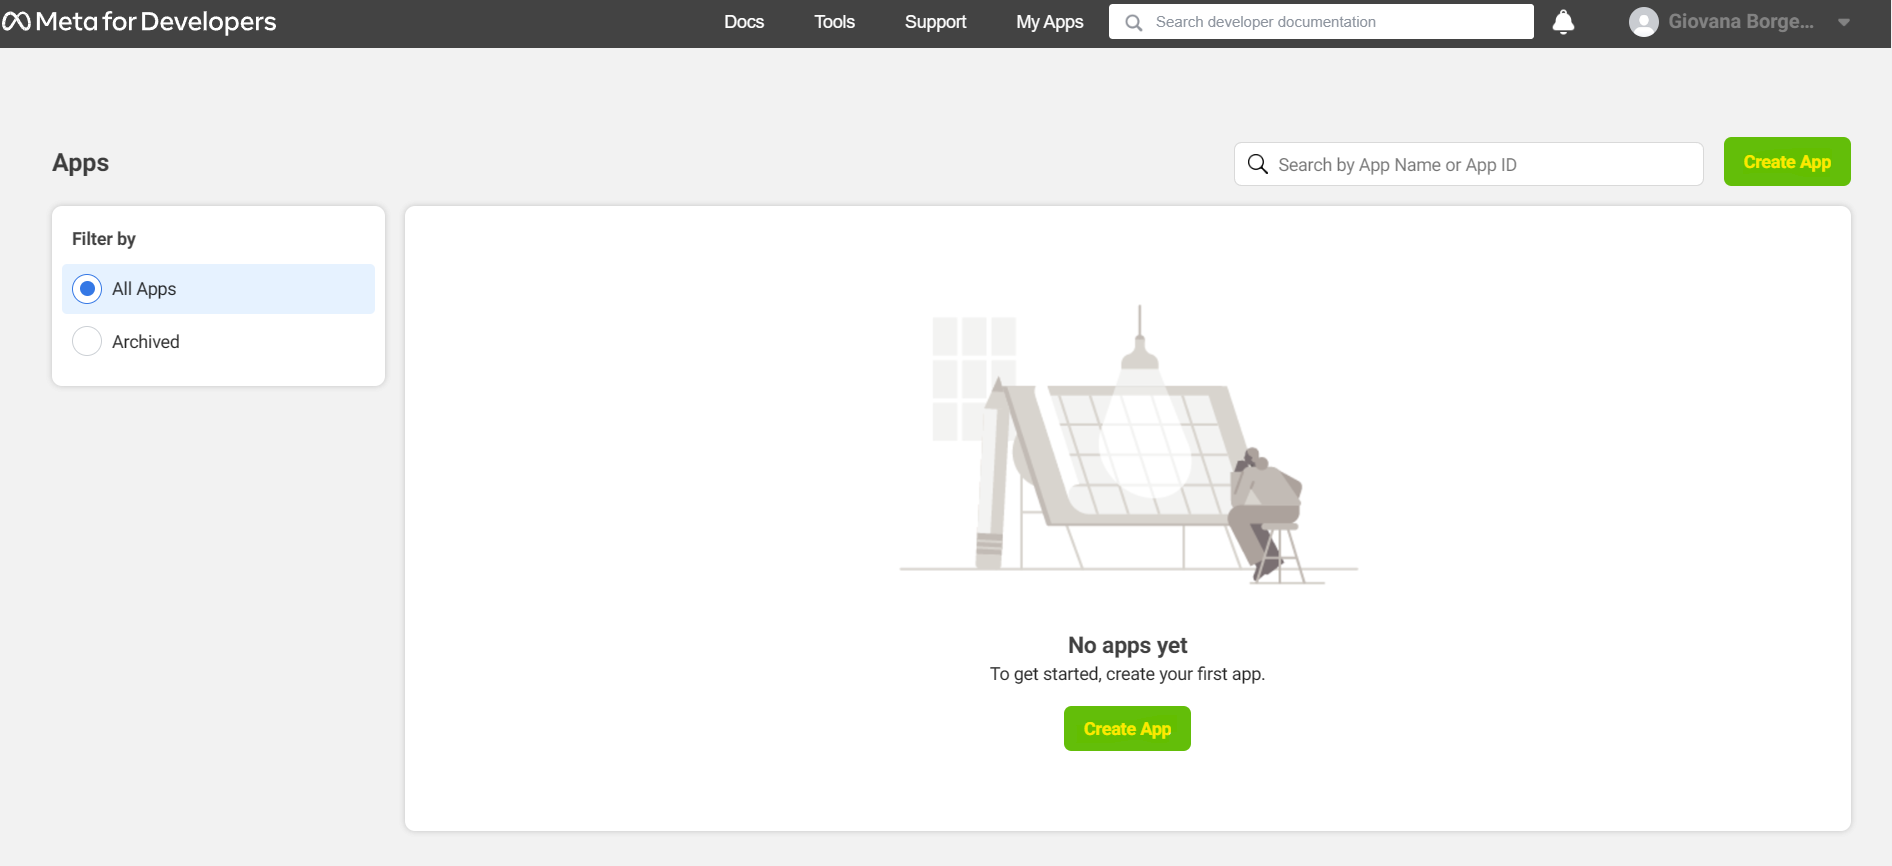
Select the option Create App and follow the steps that will appear according to your goal.
Select an application type

Enter a name for the application, contact email and if you want to connect to a business account.
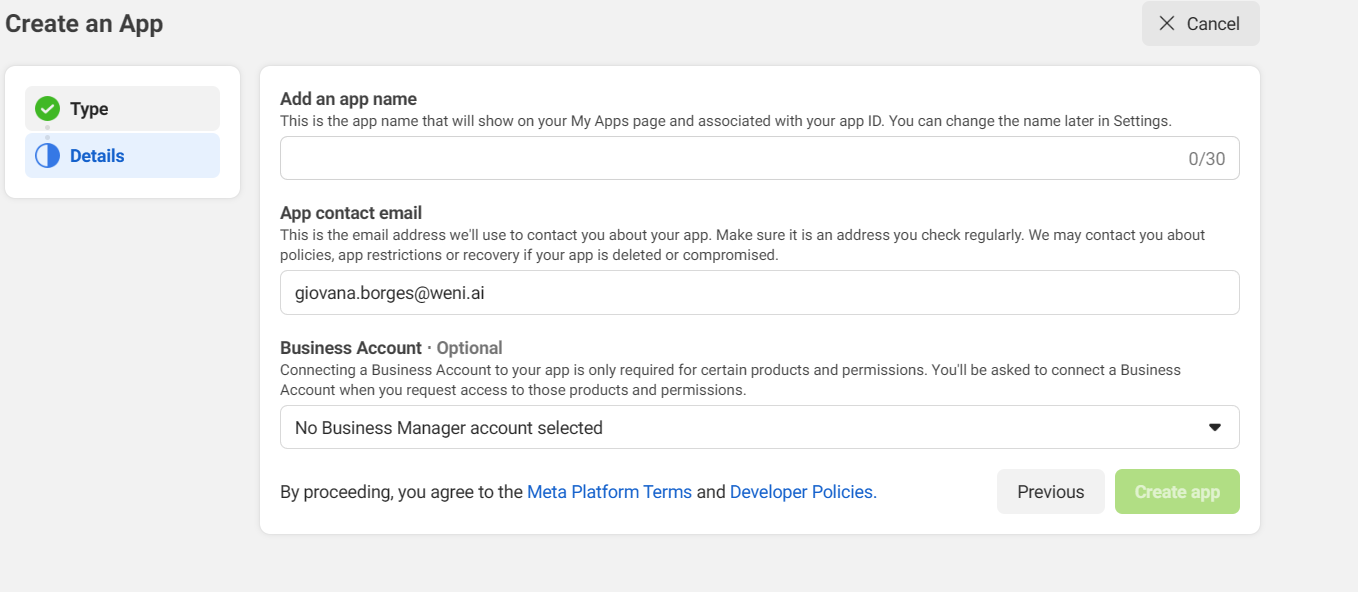
At this point you may receive a validation request.
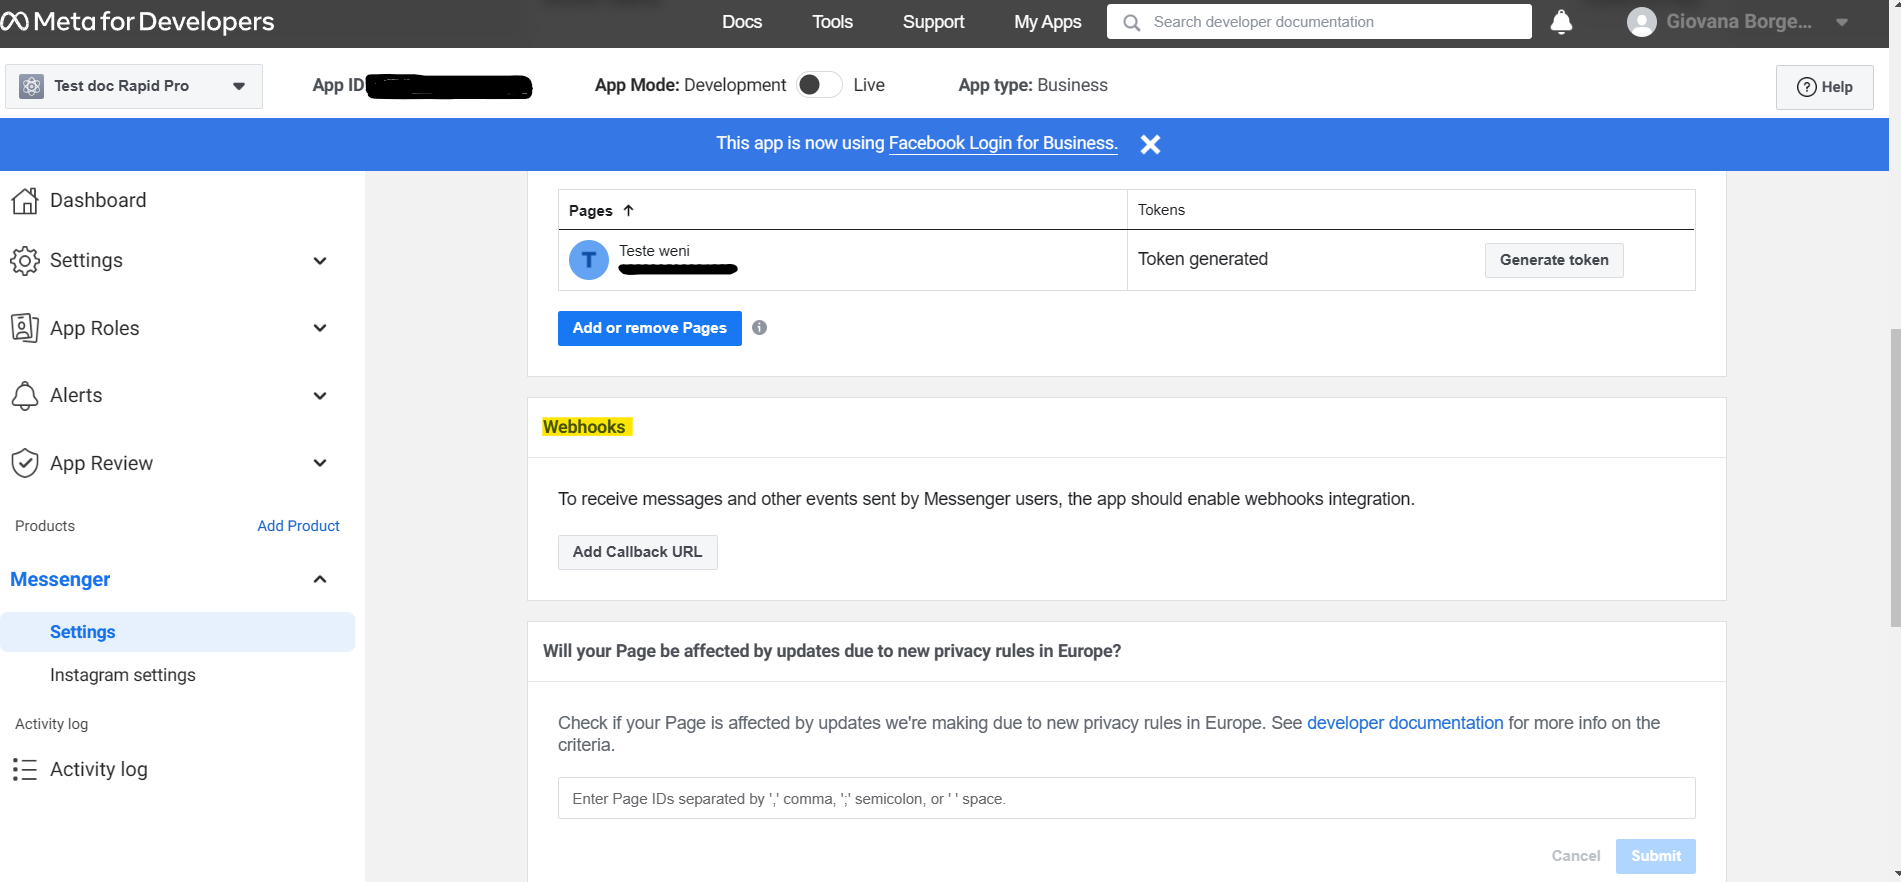
On the main management screen of your new app, scroll down and add Messenger by clicking Set up in the Messenger section.
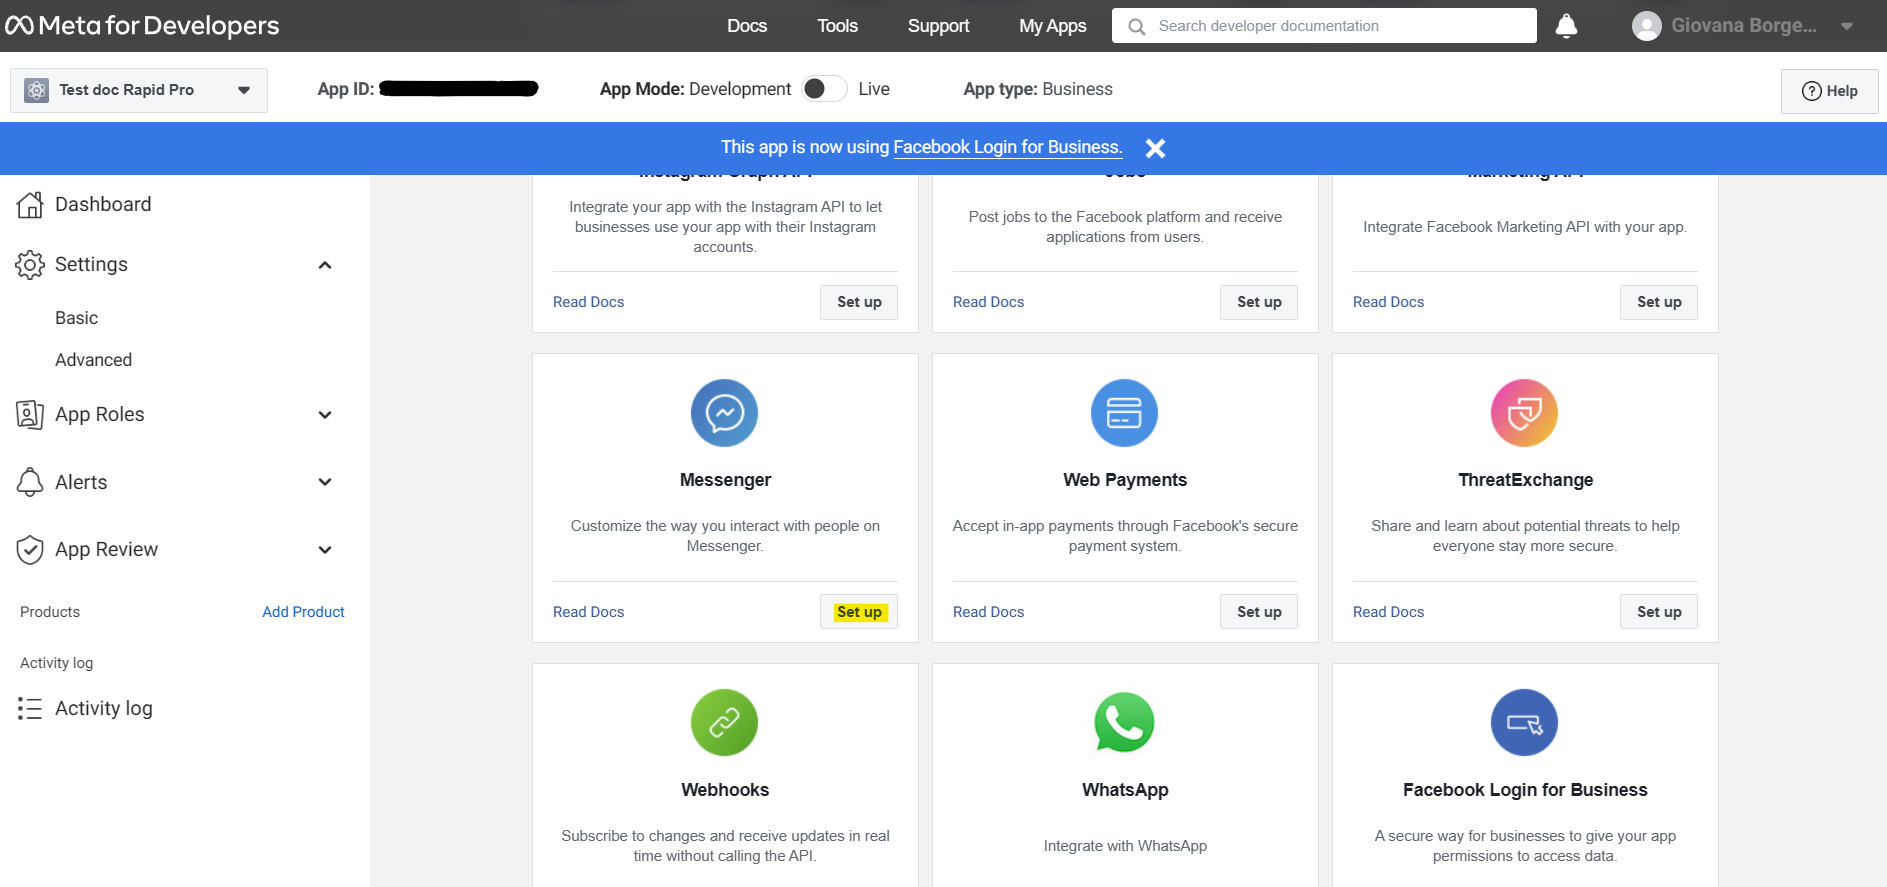
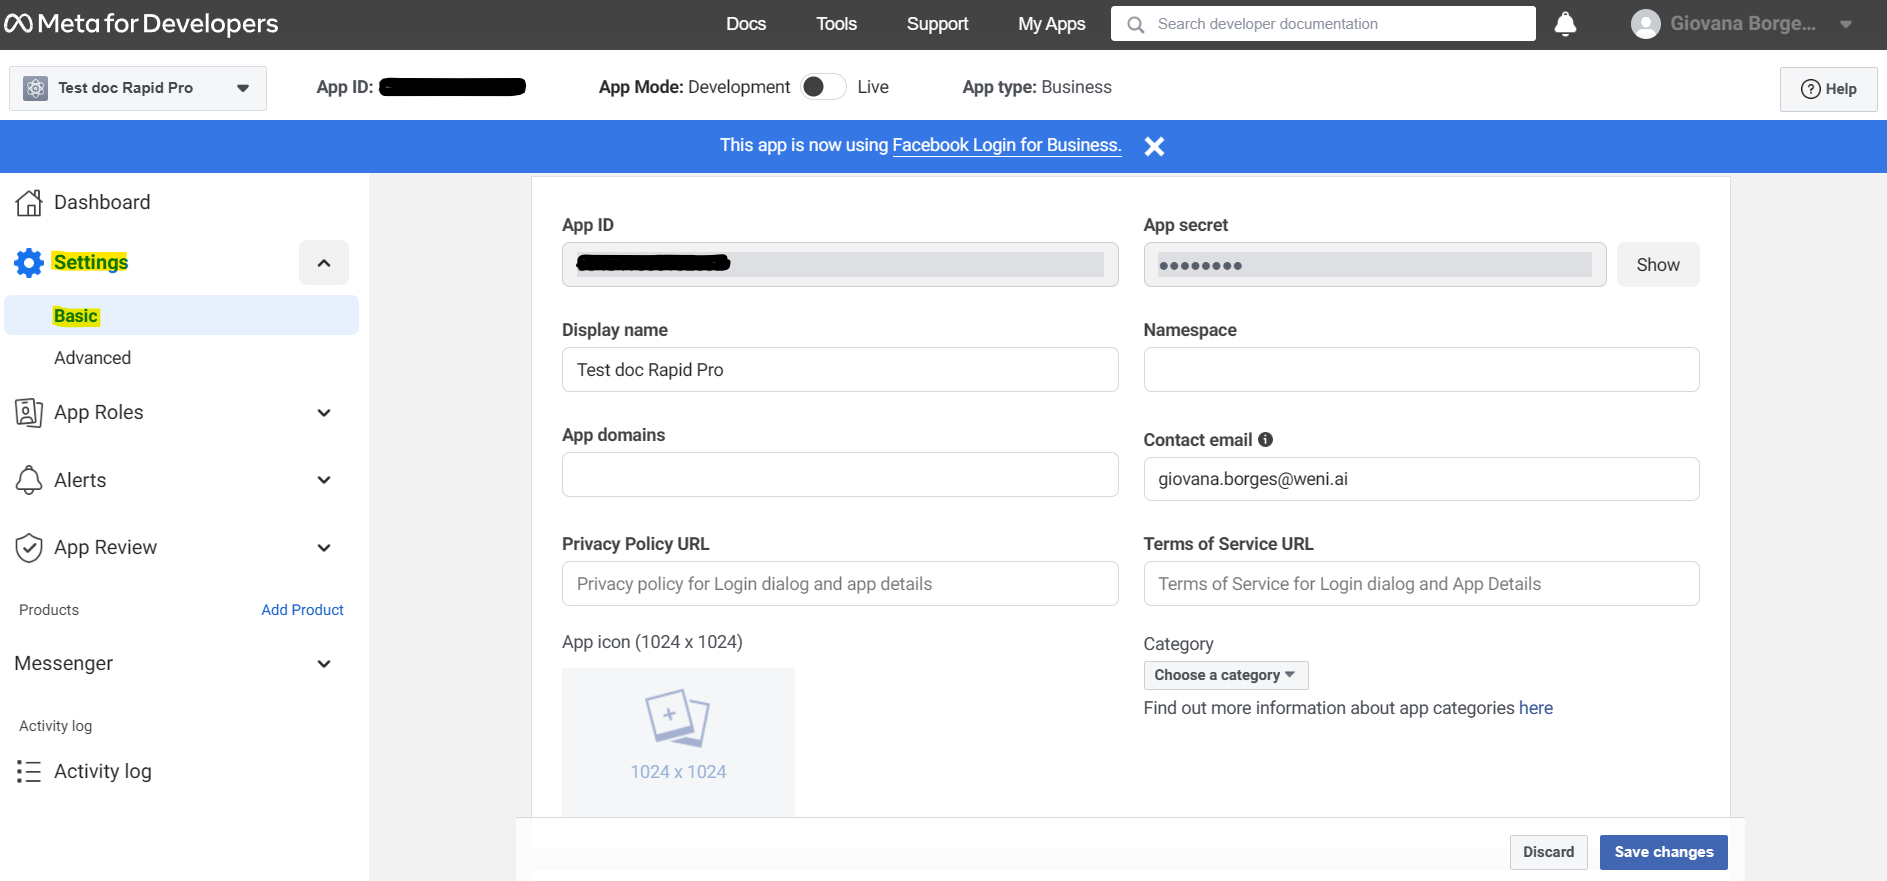
Select the Basic option under Settings, fill out the form and save your changes.
Now we will generate the token to configure the channel in the platform. To do this, select Settings inside the Messenger section and choose the page that will be linked to this app. After selecting the page you will be asked permission of the app to the page, just confirm.
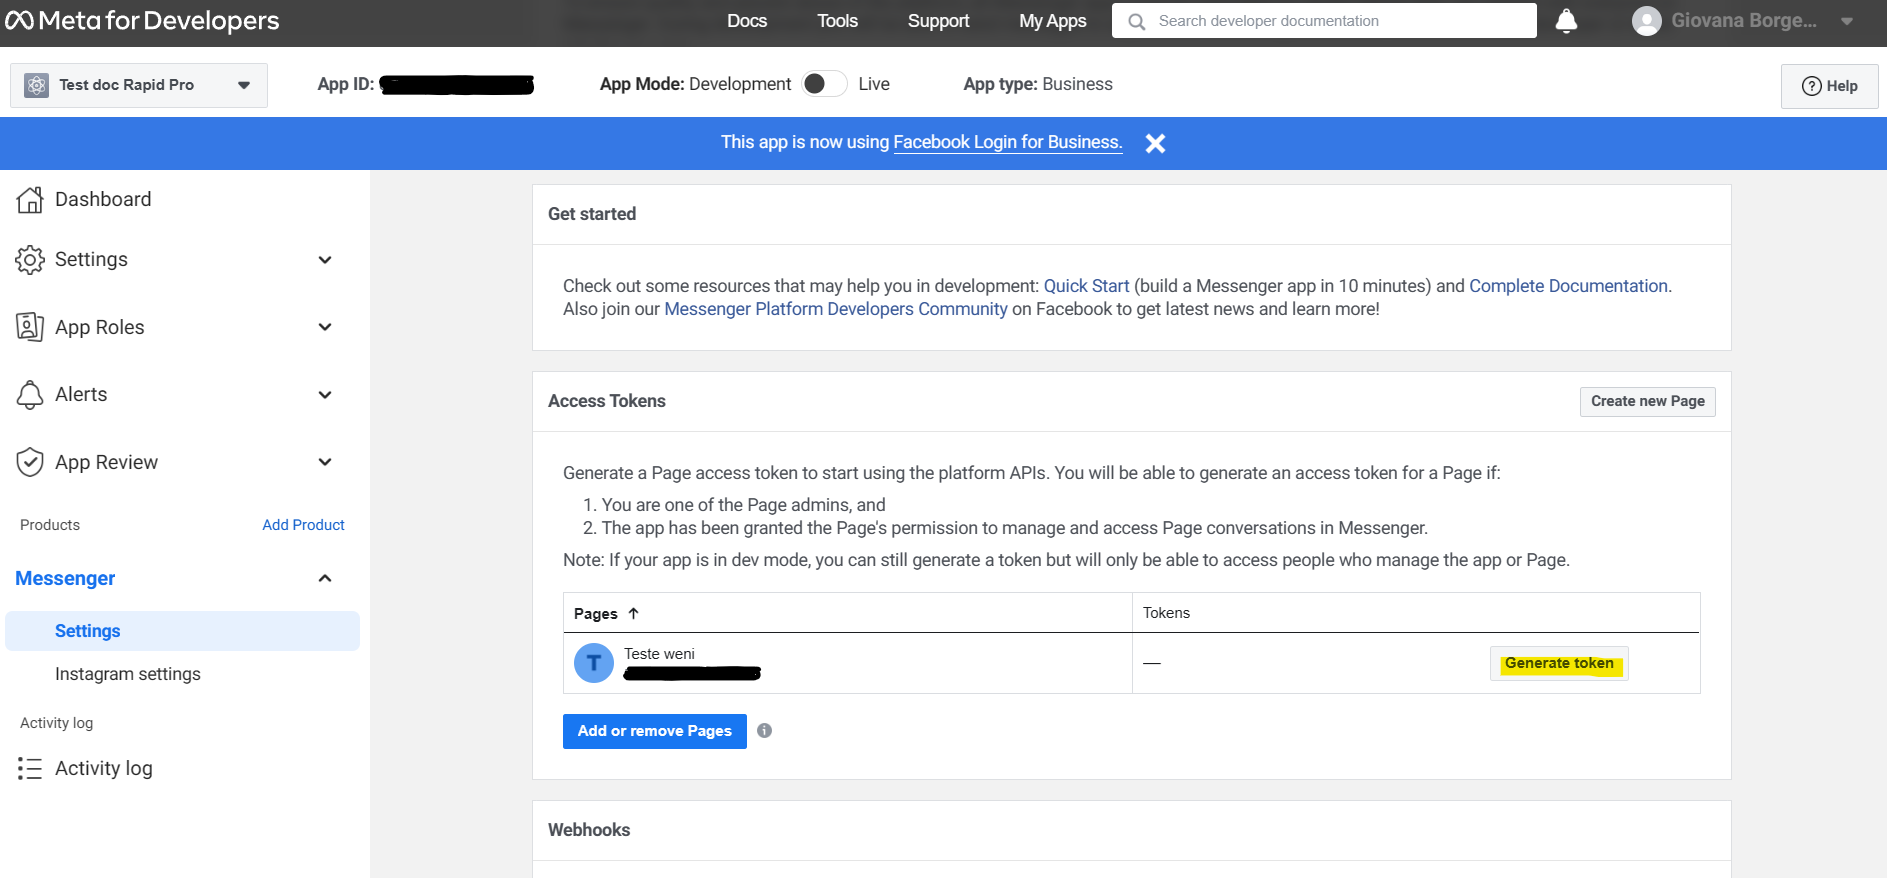
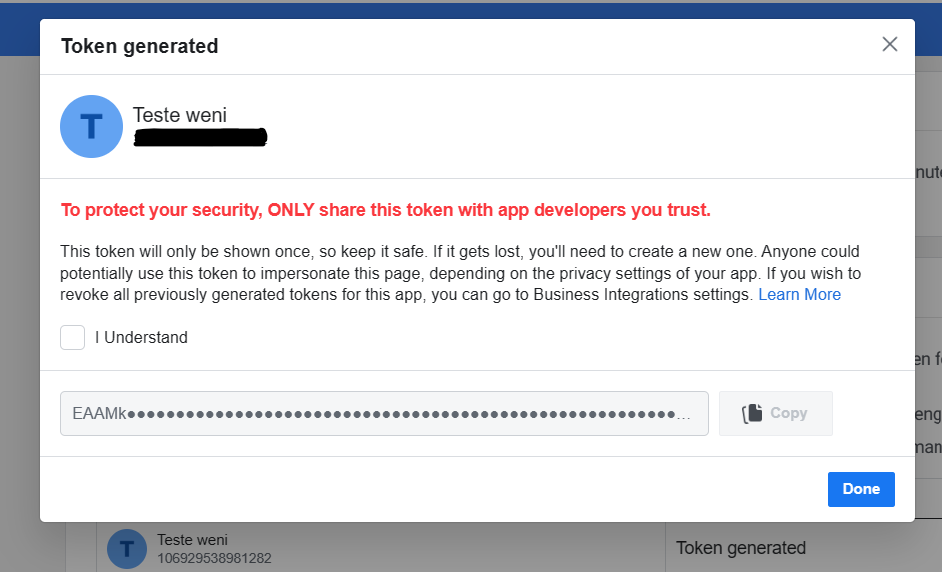
After this procedure, an Access Token will be generated, which will be configured in the platform.
- Linking the app to the platform to create the channel
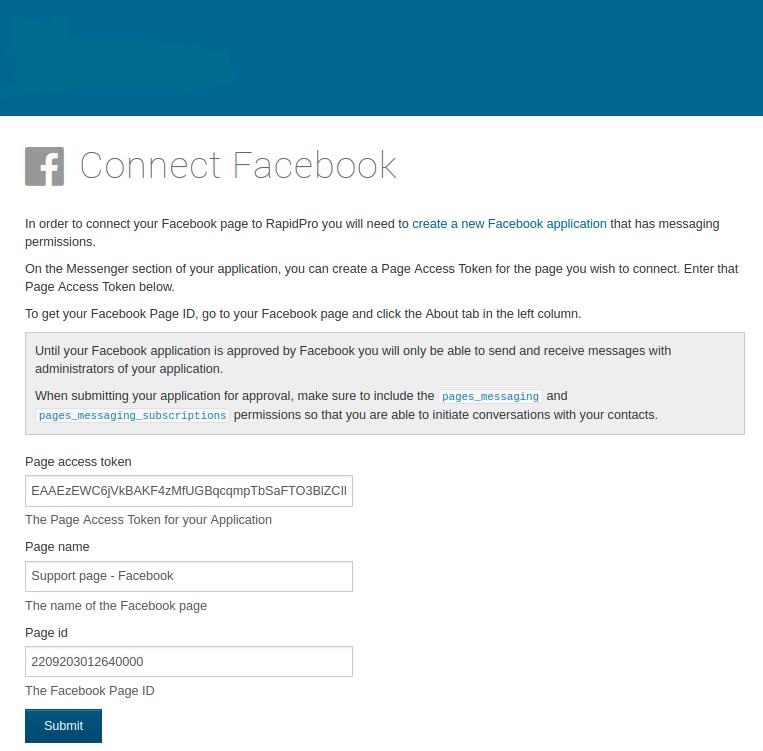
With the Page Access Token, open the properties of your Org in the platform (click the Org name in the upper right corner of the screen) and then select the add channel option.

Scroll down to the social media channels section and select the Facebook option.

On the add channel screen fill in the Access Token (identifier you generated in the app), Page Name (for channel ID), and Page ID (this number can be purchased in the About section of your page).
This procedure will generate the callback URLs to be configured in the Webhooks section in the app.
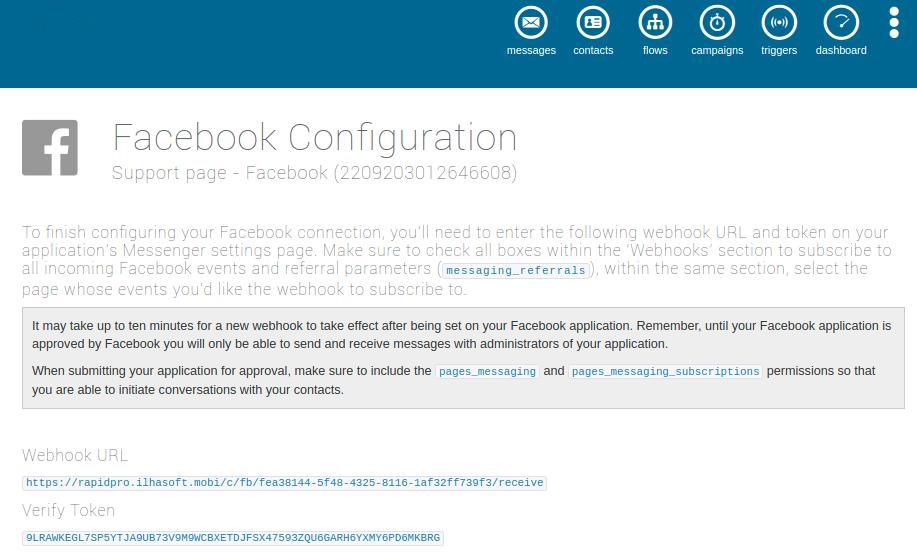
Go back to the App on the Facebook developer site and go to configure Webhooks within the messenger settings.
Fill in the information according to the data generated in the addition of your channel in the platform, check the Messages, Messaging_postbacks, Messaging_optins, Message_deliveries and Messanging_referrals options and click Check and Save.

When you complete this procedure, make sure that the parameters have been correctly selected and that page has been properly entered in the Webhooks.

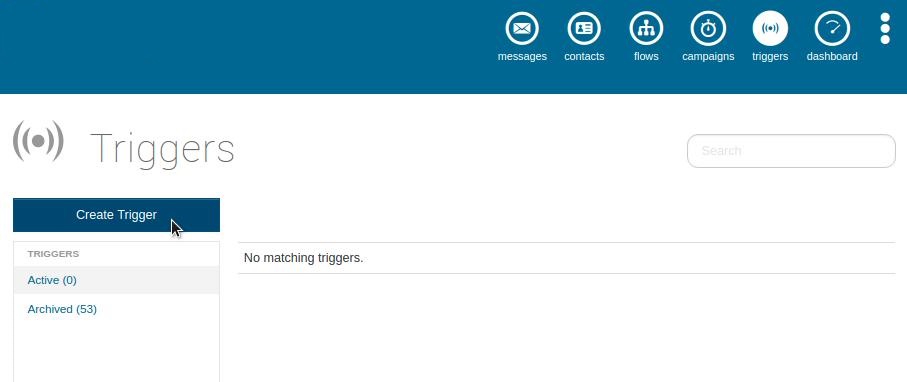
Finishing the channel functionality Now all we need is to configure how the conversation will be interpreted by the chatbot. This is done in the platform through a trigger that only appears after adding a Facebook channel successfully. To do this go to the Triggers section in the platform and click on Create trigger.
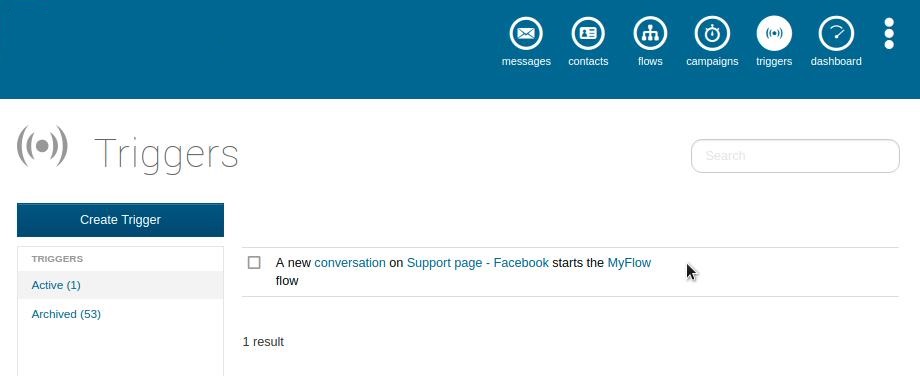
From the available options select the one as shown in the figure below, which will cause a Get Started button to appear on the chat once a new conversation with the page is started and thus allow the user to approve the exchange of messages with the chatbot.

Select the Facebook channel you just created, the flow that will be triggered when you the conversation is started, and click Create Trigger.

The screen will return to the triggers creation page and display the one you just created.
Conclusion: That’s all it takes to add your Facebook page as a channel to the platform. Completing the above steps the chat will appear as follows when clicking the button to send message.

And clicking on Get Started chatbot takes over.
